Raspberry Crumble Delight — Technique Guide
Raspberry Crumble Delight is a timeless dessert that combines sweet-tart raspberries with a buttery, crisp topping. While it looks simple, mastering the technique transforms it from an ordinary fruit bake into a bakery-quality dessert with perfect texture, balanced flavor, and a golden, crunchy finish.
This comprehensive technique guide walks you through every step — from choosing raspberries to achieving the ideal crumble texture — so your raspberry crumble turns out flawless every time.
Understanding the Structure of a Perfect Crumble
A well-executed raspberry crumble has three essential components:
- The Fruit Layer – Juicy, thickened, and balanced between sweet and tart
- The Crumble Topping – Buttery, crisp, and slightly chunky
- The Bake – Even heat distribution for bubbling filling and golden topping
Mastering these elements ensures your crumble is neither soggy nor dry.
Choosing the Right Raspberries
Fresh vs. Frozen Raspberries
Fresh Raspberries
- Best during peak season
- Brighter flavor and firmer structure
- Less excess moisture
Frozen Raspberries
- Convenient year-round
- Release more liquid
- Require extra thickening
Technique Tip:
If using frozen berries, do not thaw them fully before baking. Toss them with thickener while still slightly frozen to prevent excess liquid release.
Balancing Sweetness and Tartness
Raspberries are naturally tart, which makes them perfect for crumble — but balancing flavor is key.
Sugar Selection
- Granulated sugar: Clean sweetness
- Brown sugar: Adds depth and caramel notes
- Coconut sugar: Subtle molasses flavor
Technique Ratio:
For every 4 cups raspberries, use ½–¾ cup sugar depending on berry sweetness.
Taste a berry before baking to determine how much sugar to add.
Thickening the Raspberry Filling
One of the most common crumble mistakes is a watery filling.
Best Thickeners
- Cornstarch
- Arrowroot powder
- Tapioca starch
- All-purpose flour
Proper Technique
- Mix thickener with sugar first.
- Toss evenly with raspberries.
- Let sit for 5–10 minutes before baking.
Standard Ratio:
1–2 tablespoons cornstarch per 4 cups raspberries.
If using frozen berries, increase thickener slightly.
Enhancing Flavor Depth
Raspberry crumble can be elevated with subtle flavor enhancers:
- 1 teaspoon vanilla extract
- Zest of ½ lemon
- Pinch of salt
- Splash of almond extract
These additions deepen flavor without overpowering the fruit.
Mastering the Crumble Topping
The topping is where texture magic happens.
The Ideal Crumble Ratio
- 1 cup all-purpose flour
- ½ cup cold butter (cubed)
- ½ cup brown sugar
- Pinch of salt
Optional additions:
- Rolled oats
- Chopped nuts
- Cinnamon
Technique: How to Create Perfect Crumble Texture
Step 1: Use Cold Butter
Butter must be cold. This creates steam pockets during baking, resulting in crisp texture.
Step 2: Cut Butter into Flour
Use:
- Pastry cutter
- Fork
- Or fingertips
Stop when mixture resembles coarse crumbs with small pea-sized chunks.
Step 3: Avoid Overmixing
Overworking creates a paste instead of crumbly texture.
Layering for Even Baking
- Spread raspberry filling evenly in baking dish.
- Distribute crumble topping loosely.
- Do not press topping down — this prevents crisping.
Best Dish Size:
8×8-inch baking dish for balanced fruit-to-crumble ratio.
Baking Technique
Oven Temperature
350°F (175°C)
Bake Time
35–45 minutes
You’ll know it’s ready when:
- Filling bubbles at edges
- Topping turns golden brown
- Kitchen smells buttery and fruity
If topping browns too quickly, loosely tent with foil.
Resting Period — Critical Step
Allow crumble to rest for at least 20 minutes after baking.
Why?
- Filling thickens as it cools
- Juices settle
- Slices hold shape better
Cutting too early results in runny filling.
Texture Control Techniques
For Extra Crispy Topping
- Add 2 tablespoons oats
- Sprinkle raw sugar on top before baking
For Softer Topping
- Increase butter slightly
- Use more brown sugar
For Deep Golden Color
- Bake on middle rack
- Finish last 3 minutes under broiler (watch carefully)
Preventing a Soggy Bottom
Common causes:
- Too little thickener
- Overly juicy berries
- Shallow baking time
Professional Tip:
Preheat the baking dish in the oven before adding filling for quicker heat activation.
Flavor Variations
While raspberry is the star, combining fruits adds dimension:
- Raspberry + blueberry
- Raspberry + peach
- Raspberry + apple
Keep total fruit quantity the same to maintain balance.
Serving Suggestions
Raspberry Crumble Delight is best served:
- Warm with vanilla ice cream
- With whipped cream
- With custard sauce
- With Greek yogurt for brunch
The contrast of warm crumble and cold topping enhances texture and flavor.
Make-Ahead and Storage
Make Ahead
- Prepare topping separately and refrigerate up to 2 days.
- Assemble just before baking.
Refrigeration
- Store covered for up to 4 days.
Reheating
- Warm in oven at 325°F for 10–15 minutes.
- Avoid microwaving if you want crisp topping.
Troubleshooting Guide
Filling Too Runny
Increase thickener next time or bake longer.
Topping Too Dry
Add slightly more butter.
Too Sweet
Reduce sugar or add lemon juice.
Too Tart
Increase sugar slightly or add vanilla.
Nutritional Considerations
Raspberries are:
- High in fiber
- Rich in antioxidants
- Naturally low in calories
You can make this dessert lighter by:
- Reducing sugar
- Using whole wheat flour
- Replacing part of butter with coconut oil
Why This Technique Works
This guide focuses on:
- Proper moisture balance
- Correct fat-to-flour ratio
- Controlled baking temperature
- Resting time for structure
When these elements align, you achieve:
- Thick, jam-like filling
- Buttery crisp topping
- Perfect sweet-tart harmony
Final Thoughts
Raspberry Crumble Delight is simple in appearance but relies heavily on technique. By understanding ingredient ratios, moisture control, and baking science, you can consistently create a dessert that’s rustic yet refined.
Whether served at a family dinner, holiday gathering, or cozy weekend treat, mastering these techniques ensures your raspberry crumble is always golden, bubbling, and irresistibly delicious.
With the right approach, this classic dessert becomes a signature dish worth making again and again.
Print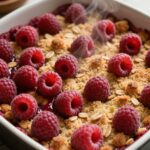
Raspberry Crumble Delight — Technique Guide
Description
Treat yourself to Raspberry Crumble Delight! Warm, juicy raspberries under a buttery, crunchy crumble — perfect with a scoop of vanilla ice cream. Easy to make and impossible to resist! 🍓✨
Ingredients
– 600 g raspberries 🍓
– 75 g granulated sugar (for fruit) 🧂
– 1 tbsp lemon juice 🍋
– 1 tsp lemon zest 🍋
– 1 tsp vanilla extract 🌿
– 120 g all-purpose flour 🌾
– 100 g rolled oats 🥣
– 100 g brown sugar (for crumble) 🍯
– 150 g cold unsalted butter, cubed 🧈
– 1/4 tsp salt 🧂
– Optional: vanilla ice cream to serve 🍨
Instructions
1 Preheat oven to 190°C (375°F). Grease a 20–23 cm baking dish or pie dish lightly with butter.
2 In a large bowl, toss the raspberries with 75 g granulated sugar, lemon juice, lemon zest, and vanilla extract until evenly coated. Spread the raspberry mixture in the prepared baking dish.
3 In a separate bowl, combine the flour, rolled oats, brown sugar, and salt. Mix with a fork or pastry cutter while adding the cold cubed butter, until the mixture resembles coarse crumbs and some pea-sized pieces remain.
4 Scatter the crumble mixture evenly over the raspberries, pressing lightly so it covers the fruit but still remains crumbly on top.
5 Bake in the preheated oven for 30–35 minutes, or until the crumble topping is golden brown and the fruit is bubbling around the edges.
6 Remove from oven and let cool for 10–15 minutes to set slightly. Serve warm with a scoop of vanilla ice cream if desired.