If you’ve never made Homemade Lemon Curd, you’re about to discover one of the most versatile and luxurious citrus spreads you can keep in your kitchen. Silky smooth, bright, and perfectly balanced between sweet and tart, lemon curd instantly elevates everything from toast and scones to cakes and cheesecakes.
Made with just a handful of simple ingredients — fresh lemons, sugar, eggs, and butter — this classic citrus curd tastes infinitely better than store-bought versions. Once you try it fresh, you’ll never go back.
What Is Lemon Curd?
Lemon curd is a thick, creamy spread made by gently cooking lemon juice, zest, sugar, eggs, and butter until it thickens into a smooth custard-like consistency.
Unlike jam, it’s not fruit preserved with pectin — it’s closer to a citrus custard. It originated in England and is traditionally served with scones and tea, especially in places like London as part of afternoon tea culture.
Why You’ll Love This Recipe
- Ultra smooth texture
- Bright, fresh lemon flavor
- Simple ingredients
- Ready in under 20 minutes
- Perfect for baking and desserts
- Freezer-friendly
It’s the kind of recipe that feels fancy but is surprisingly easy.
Ingredients
- ¾ cup fresh lemon juice (about 3–4 lemons)
- 1 tablespoon lemon zest
- ¾–1 cup granulated sugar (adjust to taste)
- 3 large eggs
- ½ cup unsalted butter, cubed
- Pinch of salt
Optional:
- 1 extra egg yolk for richer texture
Use Fresh Lemons for Best Results
Fresh lemons are essential for bright flavor. Bottled juice lacks freshness and can taste dull.
When selecting lemons:
- Look for firm, heavy fruit
- Avoid wrinkled skin
- Zest before juicing
Popular lemon varieties include:
- Eureka lemon
- Meyer lemon
Meyer lemons are slightly sweeter and less acidic, creating a softer flavor profile.
Step-by-Step Instructions
Step 1: Combine Ingredients
In a medium saucepan (off heat), whisk together:
- Lemon juice
- Lemon zest
- Sugar
- Eggs
- Salt
Whisk until smooth and fully combined.
Step 2: Cook Gently
Place saucepan over medium-low heat.
Stir constantly with a wooden spoon or silicone spatula.
Cook for 8–12 minutes until:
- Mixture thickens
- Coats the back of a spoon
- Reaches about 170°F (77°C)
Do not boil — high heat can scramble the eggs.
Step 3: Add Butter
Remove from heat and stir in butter cubes one at a time until fully melted and incorporated.
This creates that signature silky texture.
Step 4: Strain (Optional but Recommended)
Pour curd through a fine mesh sieve to remove zest and ensure ultra-smooth texture.
Step 5: Cool and Store
- Transfer to a glass jar.
- Press plastic wrap directly onto surface to prevent skin.
- Refrigerate until fully chilled (at least 2 hours).
Curd will thicken further as it cools.
Texture & Flavor Profile
This lemon curd is:
- Smooth and glossy
- Thick but spreadable
- Bright and tangy
- Balanced with buttery richness
It should feel luxurious, not runny or overly firm.
How to Use Lemon Curd
Homemade lemon curd is incredibly versatile:
Breakfast
- Spread on toast or English muffins
- Swirled into yogurt
- Layered in crepes
Desserts
- Cake filling
- Tart filling
- Cheesecake topping
- Macaron filling
- Parfait layers
It pairs beautifully with whipped cream and fresh berries.
Healthy Adjustments
If you prefer lighter baking swaps:
- Reduce sugar slightly and balance with a touch of maple syrup.
- Use high-quality unsalted butter in moderation.
- For dairy-free, try a plant-based butter substitute (texture may vary).
Storage Guidelines
Refrigerator
Store in airtight jar up to 2 weeks.
Freezer
Freeze up to 3 months. Thaw overnight in refrigerator.
Lemon curd freezes surprisingly well without losing texture.
Troubleshooting Common Problems
Why is my lemon curd runny?
- Not cooked long enough
- Didn’t reach proper temperature
Why did it curdle?
- Heat too high
- Not stirred constantly
If slightly curdled, blend briefly with immersion blender.
Nutritional Information (Approximate per tablespoon)
- Calories: 55
- Fat: 4g
- Carbohydrates: 5g
- Sugar: 4g
- Protein: 1g
Values vary based on sugar amount.
Tips for Perfect Lemon Curd Every Time
- Use low heat
- Stir constantly
- Don’t skip straining
- Chill fully before using
- Use fresh lemons only
Precision matters — lemon curd is simple but technique-sensitive.
Flavor Variations
Once you master lemon curd, try:
- Lime curd
- Orange curd
- Passion fruit curd
- Mixed berry curd
The base technique remains the same — simply swap juice.
Why Homemade Is Better Than Store-Bought
Store-bought versions often contain stabilizers and artificial flavors. Homemade lemon curd offers:
- Brighter citrus flavor
- Cleaner ingredient list
- Customizable sweetness
- Fresher taste
It’s one of those recipes where homemade truly shines.
Final Thoughts
This Homemade Lemon Curd recipe is silky, vibrant, and incredibly versatile. Whether you’re layering it into cakes, spreading it on warm scones, or swirling it into yogurt, it brings a burst of sunshine to any dish.
Once you make it from scratch, you’ll see how simple and rewarding it is — and you may never buy it in a jar again.
Print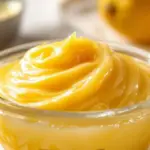
Homemade Lemon Curd (Smooth, Tangy & Foolproof)
Ingredients
- 3 large eggs
- 1 cup (200g) granulated sugar
- ½ cup (120ml) fresh lemon juice (about 3–4 lemons)
- Zest of 2 lemons
- 6 tbsp (85g) unsalted butter, cut into small cubes
- Pinch of salt
Instructions
- Whisk base: In a medium heatproof bowl, whisk eggs, sugar, lemon juice, zest, and salt until smooth.
- Cook gently: Place bowl over a saucepan of simmering water (double boiler method—bowl should not touch water). Cook, stirring constantly with a silicone spatula, for 8–12 minutes, until thickened and coats the back of a spoon.
→ Tip: The curd is ready when it reaches 170°F (77°C) or leaves a clear path when you run a finger across the spatula. - Add butter: Remove from heat. Whisk in butter, one cube at a time, until fully melted and glossy.
- Strain (optional): For ultra-smooth texture, strain through a fine-mesh sieve to remove zest and any cooked egg bits.
- Cool & store: Press plastic wrap directly onto surface to prevent skin. Chill at least 2 hours before using.
💡 Pro Tips:
– Use freshly squeezed lemon juice—bottled can taste metallic.
– For longer shelf life, pour hot curd into sterilized jars; keeps up to 2 weeks refrigerated or 3 months frozen.
– Double the batch—it disappears fast!
Prep Time & Nutrition (per 2-tbsp serving, makes ~1½ cups):
Servings: 12 | Calories: 90 | Net Carbs: 12g | Fats: 5g | Protein: 2g