Introduction
A weekend classic reimagined with a baker’s instincts.
These cupcakes are the kind of treat I reach for when I want something reliably comforting yet technically satisfying to bake. The focus here is on achieving a light, tender crumb that still feels indulgent beneath a cloud of buttercream. Throughout this article I’ll share the reasoning behind small technique choices, sensory cues to watch for, and the subtle adjustments that turn a basic batter into something noteworthy.
As a professional recipe creator I obsess over texture: how the batter holds air, how the crumb traps moisture, and how the frosting complements without overwhelming. Expect conversational, practical guidance—tips you can use from the first whisk to the final swirl of icing. I’ll also cover useful troubleshooting notes that prevent common pitfalls like dense crumb or cracked domes.
Read on for a full ingredient breakdown, a step-by-step assembly guide, evocative descriptions of flavor and mouthfeel, plus storage and make-ahead strategies that preserve freshness. Whether you’re baking for a party or a quiet afternoon, these cupcakes are designed to be approachable for home bakers yet generous in technique so you can refine your instincts with each batch. Let’s get into the why and how behind that perfect, tender, vanilla-scented bite.
Why You’ll Love This Recipe
Why these cupcakes stand out.
I develop recipes with two priorities: predictable results and delightful eating experience. These cupcakes hit both. They deliver a tender, airy crumb that still feels satisfyingly moist on the palate, and a buttercream that is silky rather than cloying. The balance of dairy and fat in the batter creates a richness that lingers, while the vanilla provides a clean aromatic backbone.
Beyond flavor, the recipe is forgiving: the mixing method minimizes the risk of overworking gluten, and the inclusion of a small amount of oil alongside butter helps retain moisture day-to-day. That means you can bake with confidence—these cupcakes tolerate small timing or temperature variances better than many delicate sponge-style cakes. They are excellent for scaling up, decorating, or keeping simple with a dusting of sprinkles.
This is also a versatile base: think of it as a canvas. Swap extracts, fold in citrus zest, or add a handful of finely chopped berries for variations without changing the core technique. In short, you’ll love this recipe for its reliability, approachable technique, and deliciously familiar flavor—a dependable go-to that consistently impresses both new bakers and dessert lovers.
Flavor & Texture Profile
What to expect when you take the first bite.
Texturally, these cupcakes are engineered to be light yet tender. The crumb should feel airy when you bite in, with tiny uniform holes that signal proper aeration and gentle mixing. There’s a subtle chew from the flour structure, balanced by a creamy mouthfeel from the combination of butter, milk, and sour cream or yogurt. The inclusion of a small amount of neutral oil keeps the interior supple and helps the cupcakes retain moisture over time.
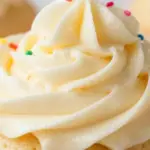
On the flavor side, the profile is straightforward and true-to-vanilla: a well-rounded sweetness supported by dairy notes. The butter gives a rounded, savory depth that prevents the cake from tasting flat, while the dairy components contribute a delicate tang and richness. The buttercream finishes the experience with a smooth, slightly sweet coating that melts on the tongue and amplifies the vanilla without overpowering the cake.
When tuning the recipe for different preferences, consider these sensory cues:
- If the crumb is too dense: it usually means less trapped air—double-check creaming and avoid overmixing after adding flour.
- If the cupcakes feel dry: ensure the fat-to-liquid balance and consider using full-fat yogurt or sour cream.
- If the flavor is flat: use good-quality vanilla and don’t skimp on salt—a pinch enhances the overall taste.
These small adjustments are how you move from good to memorable.
Gathering Ingredients
Everything you need, organized for efficiency.
Before you start, assemble your ingredients and tools so the process flows smoothly. I recommend measuring dry ingredients into bowls and placing wet components together to use the alternating addition method without pause. Having bowls of measured ingredients also makes it easy to spot-check minor subs or swaps, and reduces the risk of accidentally overmixing while searching for an ingredient.
Organizing this way helps you focus on texture cues during mixing: watch for a lightened butter-sugar blend, a ribbon stage when eggs are incorporated, and a smooth batter that’s neither overworked nor lumpy. If you plan to decorate, line up any sprinkles or piping tips in advance so you can move quickly once the cupcakes are cool.
Ingredient list:
- All-purpose flour
- Granulated sugar
- Baking powder
- Baking soda
- Salt
- Unsalted butter, softened
- Large eggs
- Pure vanilla extract
- Whole milk
- Sour cream or plain yogurt
- Vegetable oil
- Cupcake liners
- For the buttercream: unsalted butter, powdered sugar, milk or cream, vanilla extract, pinch of salt
- Optional: sprinkles or decorations
Keep these items at hand and at the right temperature—butter softened (not melted), eggs at cool room temperature, and dairy straight from the fridge unless the recipe specifies otherwise. Small prep steps like this make a measurable difference in final texture and ease of assembly.
Preparation Overview
A clear plan before you bake.
Good baking is as much about organization as it is about technique. In the preparation phase, focus on mise en place: measure, sort, and set up tools so that you can work steadily without interruption. I always recommend preheating the oven and lining the muffin tin before mixing to avoid rushing at the last minute. Place an oven rack in the center position for the most even heat distribution.
As you assemble the batter, pay attention to the rhythm of combining ingredients. The creaming stage is where you incorporate air; beat until the mixture noticeably lightens in color and texture. When you combine the dry and wet components, alternate additions and mix lightly until just combined—this protects the batter from developing tough gluten. The batter should be smooth and slightly thick, with a consistency that holds shape when scooped but still levels out slightly in the liner.
Allow the baked cupcakes to cool completely before frosting. Cool on a wire rack to encourage even airflow around each cake and prevent condensation under the frosting. If you plan to decorate, chilling the cupcakes briefly can make piping easier and reduce crumb transfer. Finally, assemble piping bags, tips, and desired decorations so you can work efficiently once the cakes are ready. This preparation approach reduces stress and improves the quality of your final presentation.
Cooking / Assembly Process
Step-by-step assembly with attention to tactile cues.
Begin by creaming the softened butter and sugar until the mixture is pale and light—this is a tactile and visual cue that air has been incorporated. Add eggs one at a time, mixing until each is fully incorporated; the batter should remain emulsified and smooth rather than curdled. When you combine dry and wet components, alternate additions and fold gently to preserve that aeration. The batter should be glossy and pourable but still hold some structure when scooped.
Spoon batter into prepared liners to the recommended fill level and smooth any peaks so the surface is even. During baking, look for consistent doming and an even, golden color; these are signs of steady oven heat and proper batter structure. Once baked, allow cupcakes to rest briefly in the pan to set, then transfer to a wire rack to cool completely. For the buttercream, whip the softened butter until creamy, then gradually add powdered sugar and liquid, adjusting for the consistency you desire. The frosting should be smooth and pipeable—neither too stiff nor too soft—so it holds shape but still feels silky in the mouth.
Assemble with care: use a piping bag for clean decoration, rotate the cupcake with one hand while piping with the other for steady control, and finish with sprinkles or embellishments while the frosting is slightly tacky. If you need to make the process more efficient, consider piping frosting into a chilled bowl first and chilling briefly to firm up before transferring to cupcakes. These tactile tips help maintain consistent results and an appealing final texture.
Serving Suggestions
Presentation and pairing ideas to elevate your cupcakes.
These vanilla cupcakes pair beautifully with simple presentations that let the texture and flavor shine. For everyday serving, a classic swirl of buttercream finished with a scatter of rainbow sprinkles or a light dusting of powdered sugar keeps the focus on the cake’s tender crumb. For a more refined look, consider piping a rosette or smooth dome and finishing with a single piece of candied citrus peel or finely grated vanilla bean for an elegant touch.
Think about complementary beverages and accompaniments. A bright, acidic coffee or a tall glass of cold milk highlights the cake’s buttery notes, while a cup of black tea or Earl Grey can add floral complexity. For a dessert spread, arrange cupcakes alongside simple fruit tarts or a bowl of macerated berries to introduce contrasting textures and flavors.
If you’re presenting for a celebration, coordinate colors with seasonal accents—pastel frosting and edible pearls for spring events, or rich caramel drizzles and toasted nuts for autumn gatherings. When transporting cupcakes, use a box with adjustable dividers or chill briefly to firm the frosting so decorations remain intact. These small presentation strategies make a meaningful difference in how your cupcakes are received—simple styling choices can make home-baked treats look professional and inviting.
Storage & Make-Ahead Tips
Keep freshness and texture with smart storage.
Proper storage preserves the tender crumb and keeps the buttercream silky. If you need to hold unfrosted cupcakes for a short period, store them in an airtight container at room temperature to maintain humidity and avoid drying. Frosted cupcakes are best stored in a cool environment; refrigeration extends life but can change frosting texture, so allow them to come to room temperature before serving for the best mouthfeel.
For make-ahead baking, consider these strategies: bake the cupcakes and freeze them unfrosted on a tray until solid, then transfer to a sealed container. Thaw at room temperature before frosting. Alternatively, prepare the buttercream and store it chilled; bring it back to room temperature and re-whip briefly to restore its lightness. If you’re transporting cupcakes for an event, chill them briefly in the fridge so the frosting firms up and decorations remain intact during transit.
Label containers with dates to keep track of freshness. Small adjustments—like using full-fat dairy for longer shelf life or adding a touch more liquid to the frosting when re-whipping—help restore texture after chilling. With these methods, you can plan ahead without sacrificing the delicate balance of moisture and tenderness that makes these cupcakes so appealing.
Frequently Asked Questions
Common questions and quick solutions from my baking experience.
If your cupcakes come out too dense, it’s often due to under-creaming the butter and sugar or overmixing after adding flour. To avoid this, fully cream until light and then fold the dry ingredients in gently until just combined. If they’re too dry, ensure the fat-to-liquid balance is correct and consider using full-fat yogurt or sour cream for additional moisture.
For uneven domes or cracked tops, check oven temperature accuracy and avoid overfilling liners; a consistent oven rack position can also help. If you notice frosting that’s too soft or too stiff, adjust by adding more powdered sugar to stiffen or a touch more liquid to loosen, then re-whip for a smooth texture.
When storing, unfrosted cupcakes hold well at room temperature in an airtight container, while frosted ones keep longer chilled; bring refrigerated cupcakes to room temperature before serving to restore creaminess. For make-ahead convenience, freeze unfrosted cupcakes on a tray, then store in a sealed container and thaw before frosting.
Last paragraph: If you still have questions or want variations—like gluten-free adjustments, flavor swaps, or scaling guidance—feel free to ask. I’m happy to help tailor the technique to your kitchen and preferences.
Moist & Fluffy Vanilla Cupcakes
Ingredients
- 1½ cups (190g) all-purpose flour 🌾
- 1 cup (200g) granulated sugar 🍚
- 1½ tsp baking powder 🥄
- ½ tsp baking soda 🥄
- ¼ tsp salt 🧂
- ½ cup (113g) unsalted butter, softened 🧈
- 2 large eggs 🥚
- 2 tsp pure vanilla extract 🍶
- ½ cup (120ml) whole milk 🥛
- ½ cup (120g) sour cream or plain yogurt 🥣
- 2 tbsp vegetable oil (for extra moisture) 🌻
- 12 cupcake liners and a muffin tin 🧁
- For the buttercream: 1 cup (227g) unsalted butter, softened 🧈
- For the buttercream: 3–4 cups (360–480g) powdered sugar 🍚
- For the buttercream: 2–3 tbsp milk or cream 🥛
- For the buttercream: 1 tsp vanilla extract 🍶
- For the buttercream: pinch of salt 🧂
- Optional: sprinkles or decoration ✨
Instructions
- Preheat oven to 350°F (175°C). Line a 12-cup muffin tin with cupcake liners 🧁.
- In a bowl, whisk together flour, baking powder, baking soda and salt 🌾🧂.
- In a large bowl, beat the softened butter and granulated sugar until light and fluffy, about 2–3 minutes 🧈🍚.
- Add eggs one at a time, mixing well after each addition, then beat in the vanilla extract 🥚🍶.
- In a separate measuring cup, combine milk, sour cream and vegetable oil and stir until smooth 🥛🥣🌻.
- Add the dry ingredients to the butter mixture in three additions, alternating with the milk mixture (dry → wet → dry → wet → dry), mixing until just combined. Do not overmix 🍶🌾.
- Spoon the batter into the prepared liners, filling each about 2/3 full using an ice cream scoop or spoon 🧁.
- Bake for 16–20 minutes, or until a toothpick inserted into the center comes out clean. Rotate the pan halfway through baking if your oven is uneven 🔥.
- Allow cupcakes to cool in the tin for 5 minutes, then transfer to a wire rack to cool completely before frosting 🧊.
- To make the buttercream: beat the softened butter until creamy, then gradually add powdered sugar, alternating with milk, until you reach the desired consistency. Mix in vanilla and a pinch of salt 🧈🍚🥛.
- Frost the cooled cupcakes with a piping bag or spatula and finish with sprinkles or desired decorations ✨.
- Store cupcakes in an airtight container at room temperature for up to 2 days, or refrigerate for up to 5 days (bring to room temp before serving) 🧁❄️.