When you need a quick, crowd-pleasing dessert that looks elegant but takes minimal effort, there’s nothing quite like a No-Bake Cherry Cheesecake. This classic dessert is creamy, luscious, and bursting with sweet cherry flavor — all without ever turning on your oven.
Whether you’re hosting a holiday dinner, summer BBQ, or just craving something sweet after a long day, this easy cheesecake will win hearts every time. Let’s dive into how to make the perfect No-Bake Cherry Cheesecake that’s smooth, rich, and topped with the most irresistible cherry glaze.
🍰 Why You’ll Love This No-Bake Cherry Cheesecake
There’s something magical about this dessert — it feels indulgent but comes together effortlessly. Here’s why it’s a winner:
- No oven required! Perfect for hot days or busy kitchens.
- Silky, creamy texture that melts in your mouth.
- Quick and simple — ready to chill in minutes.
- Beautiful presentation — bright red cherries on a cloud of cream.
- Make-ahead friendly — ideal for parties, holidays, or family dinners.
It’s everything you love about traditional cheesecake, but lighter, easier, and just as delicious.
🧂 Ingredients You’ll Need
This recipe uses simple ingredients you probably already have at home.
For the Crust:
- 1½ cups graham cracker crumbs (or digestive biscuits)
- ¼ cup granulated sugar
- ½ cup (1 stick) unsalted butter, melted
For the Cheesecake Filling:
- 16 ounces (2 packages) cream cheese, softened
- 1 cup powdered sugar
- 1 teaspoon pure vanilla extract
- 1½ cups heavy whipping cream (or 8 ounces Cool Whip, thawed)
For the Topping:
- 1 can (21 ounces) cherry pie filling
- Optional garnish: fresh mint leaves or white chocolate shavings
🥄 How to Make No-Bake Cherry Cheesecake
This no-fuss recipe comes together in just a few simple steps.
Step 1: Make the Crust
In a medium bowl, combine graham cracker crumbs and sugar. Pour in the melted butter and stir until the crumbs are evenly coated.
Press the mixture firmly into the bottom of a 9-inch springform pan (or 9×9-inch dish for square slices).
Use the back of a spoon or a measuring cup to pack it down tightly.
Refrigerate for at least 30 minutes to set while you prepare the filling.
Step 2: Prepare the Cheesecake Filling
In a large mixing bowl, beat the cream cheese and powdered sugar together until smooth and fluffy. Add the vanilla extract and mix well.
In a separate bowl, whip the heavy cream until stiff peaks form. Gently fold the whipped cream into the cream cheese mixture until fully combined and smooth.
This creates that dreamy, mousse-like texture we all love!
Step 3: Assemble the Cheesecake
Spoon the cream cheese filling over the chilled crust. Smooth the top with a spatula to create an even layer.
Cover with plastic wrap and refrigerate for at least 4 hours, or overnight if possible. This helps the cheesecake firm up and makes slicing easier.
Step 4: Add the Cherry Topping
Once chilled, spread the cherry pie filling evenly over the top of the cheesecake.
If you’re feeling fancy, garnish with mint leaves, white chocolate curls, or even a few fresh cherries for an extra touch of elegance.
Step 5: Slice and Serve
Carefully release the cheesecake from the springform pan. Slice with a warm, clean knife for smooth cuts, wiping between each slice.
Serve chilled and enjoy the perfect balance of sweet, tangy cherries and velvety cream cheese filling — a true dessert classic! 🍒
💡 Tips for the Perfect No-Bake Cherry Cheesecake
- Use full-fat cream cheese for the best flavor and texture. Low-fat versions tend to make the filling too soft.
- Chill thoroughly — at least 4 hours, but overnight is even better.
- Don’t overmix once you add the whipped cream — fold gently to keep it airy.
- Line your pan with parchment paper for easy removal.
- Experiment with flavors — try a chocolate crust, or swap the cherries for blueberries, raspberries, or strawberries!
🍒 Variations You’ll Love
- Mini Cherry Cheesecakes:
Divide the crust and filling among cupcake liners for cute individual servings. Perfect for parties! - Chocolate Cherry Cheesecake:
Add 2 tablespoons of cocoa powder to the crust and top with chocolate shavings. - Cherry Almond Cheesecake:
Mix ½ teaspoon almond extract into the filling for a nutty twist. - Vegan Version:
Use dairy-free cream cheese, coconut whipped cream, and plant-based butter — still delicious!
🍽️ Serving Suggestions
No-Bake Cherry Cheesecake pairs beautifully with:
- A cup of freshly brewed coffee or espresso
- A drizzle of dark chocolate sauce for extra indulgence
- A scoop of vanilla ice cream for a decadent dessert combo
- Whipped cream rosettes around the edges for a bakery-style look
🧊 Make-Ahead, Storage & Freezing Tips
To Make Ahead:
Prepare the crust and filling a day in advance, then add the cherry topping before serving.
To Store:
Keep covered in the refrigerator for up to 5 days.
To Freeze:
Freeze the cheesecake (without topping) for up to 2 months. Thaw in the fridge overnight, then add cherry topping before serving.
❤️ Why This Recipe Works Every Time
This No-Bake Cherry Cheesecake is foolproof because it uses a classic ratio of creamy filling to crumbly crust, with a stable, perfectly set texture. The light, whipped filling complements the tart cherries beautifully, making each bite a perfect balance of flavor and texture.
It’s a dessert that feels special but doesn’t require hours in the kitchen — making it ideal for both beginner bakers and experienced dessert lovers alike.
💬 Frequently Asked Questions
Q: Can I use homemade cherry topping?
A: Absolutely! Simmer fresh or frozen cherries with sugar, cornstarch, and lemon juice until thickened — it’s even better than canned.
Q: Can I make this in a 9×13-inch pan?
A: Yes, just double the recipe for a thicker layer and more servings.
Q: What can I use instead of graham crackers?
A: Try vanilla wafers, Biscoff cookies, or Oreos for fun crust variations.
Q: How do I prevent a runny filling?
A: Be sure to chill the cheesecake long enough — at least 4 hours or overnight — so it sets properly.
🍒 Final Thoughts
No-Bake Cherry Cheesecake is the ultimate blend of simplicity and elegance. With its buttery graham cracker crust, luscious cream cheese filling, and vibrant cherry topping, it’s a dessert that never fails to impress.
Whether you’re celebrating a special occasion or just want a sweet treat to brighten your week, this recipe delivers pure creamy perfection — every single time.
So grab your mixing bowl, whip up this easy no-bake cheesecake, and get ready for dessert bliss — no oven required! ❤️🍒
Print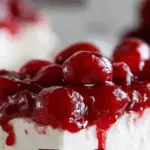
No-Bake Cherry Cheesecake: A Creamy, Dreamy Dessert You’ll Love Year-Round
Ingredients
For the crust:
• 1 ½ cups graham cracker crumbs (or gluten-free cookies)
• ¼ cup melted butter or coconut oil
• 2 tbsp brown sugar
For the filling:
• 16 oz cream cheese, softened (2 blocks)
• ½ cup granulated sugar
• 1 tsp vanilla extract
• 1 cup heavy cream or full-fat coconut cream (cold)
• 1 tbsp lemon juice
For the cherry topping:
• 1 can (14 oz) cherry pie filling (or 2 cups fresh cherries + ¼ cup sugar + 1 tbsp cornstarch, cooked & cooled)
• Optional: 1 tsp kirsch or almond extract for depth
Instructions
- Make the crust: Mix graham cracker crumbs, melted butter, and brown sugar. Press firmly into the bottom of a 9-inch springform pan or pie dish. Chill 10 minutes.
- Make the filling: In a large bowl, beat cream cheese, sugar, vanilla, and lemon juice until smooth and fluffy.
- In another bowl, whip cold heavy cream to stiff peaks. Gently fold into cream cheese mixture until light and airy.
- Pour over crust and spread evenly. Chill 1 hour to set slightly.
- Add the topping: Spoon cherry pie filling over the cheesecake. Smooth gently.
- Chill at least 4 hours (or overnight) before serving.
- Slice with a warm knife for clean cuts. Garnish with whipped cream or whole cherries if desired.
✨ Perfect for summer parties, potlucks, or when you want a cool, creamy dessert without turning on the oven!
💡 Make it festive: Use mixed berry pie filling or layer with chocolate for a twist!
PREP TIME & NUTRITION :
Prep Time : 20 mins , Cook Time : 0 mins , Total Time : 5 hrs (includes chilling) , Servings : 10 slices , Calories : 320 , Net Carbs: 28g , Fats: 21g , Protein: 5g