Introduction
Soft, comforting, and unfussy — that’s the heart of these peanut butter banana cookies. I remember the first time I mashed a spotty banana into a scoop of peanut butter and thought, why not let those two be the backbone of a cookie? The result is a compact little treat that bridges the gap between breakfast and dessert: familiar pantry flavors turned into a tender, chewy bite.
Why this version works:
It leans on ripe fruit for natural sweetness, peanut butter for richness and structure, and oats for a rustic chew. The dough comes together fast and behaves forgivingly: a sticky scoop, a gentle flatten, and a short bake that leaves the centers soft and the edges lightly golden. If you like cookies that feel homemade and cozy — not overly sweet, not overly fussy — these will become a reliable, weeknight go-to.
As a food blogger and recipe developer I focus on techniques that deliver consistent texture and an approachable method. Expect notes about ingredient swaps, subtle textural nudges, and serving ideas in the sections ahead. Whether you’re making these for a lunchbox, a last-minute dessert, or an afternoon pick-me-up with coffee, the simplicity is the charm. I’ll walk you through the ingredient choices and the quick assembly so you can get warm cookies from oven to hand with confidence.
Why You’ll Love This Recipe
Simplicity meets satisfying texture. These cookies are joyful because they require minimal equipment and deliver maximum comfort. With everyday pantry items and a forgiving dough, anyone can make them without fuss. I love recipes that welcome improvisation and this one does just that — add mix-ins, skip the sugar swap, or make them dairy-free if needed.
Practical benefits:
- Fast assembly: a single bowl keeps cleanup quick and encourages home bakers to try them on a weekday evening.
- Customizable: optional bits like chocolate chips or chopped peanuts change the mouthfeel and flavor intensity, making the recipe versatile.
- Snackable texture: they stay soft rather than crisp, so they’re perfect for tucking into a lunchbox or enjoying warm with tea.
As someone who tests dozens of cookie recipes, I appreciate how this one balances density and tenderness: the peanut butter gives body while banana and oats contribute chew and subtle fruitiness. The overall sweetness is gentle, which keeps the peanut-forward character shining through. If you’re looking for a cookie that’s both comforting and approachable — one that doesn’t demand special ingredients or long hands-on time — these will check that box beautifully. Expect helpful tips on mixing and timing later, and a couple of serving variations to elevate the experience.
Flavor & Texture Profile
Taste:
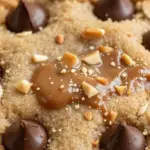
The first bite greets you with warm, nutty peanut butter and the mellow, fragrant sweetness of ripe banana. If you choose to fold in chocolate chips, they add a familiar melty counterpoint; chopped peanuts introduce a roasted note and a contrasting crunch. Vanilla offers a whisper of aromatics that lifts the whole cookie without competing with the core flavors.
Texture:
These cookies are meant to be soft and slightly chewy in the center with edges that develop a gentle firmness as they cool. Rolled oats give structure and a pleasant chew, while the mashed banana keeps crumb and moisture intact. The peanut butter acts as both flavor anchor and binder; it gives a dense, tender crumb rather than a cakey one. When baked just until the centers are set, the cookies retain a yield that feels indulgent but not greasy.
Balance and contrast:
A sprinkling of chopped peanuts on top adds texture contrast, and pressing a few extra chocolate chips on the tops before baking delivers pockets of molten chocolate on warm bites. If you prefer a firmer bite, allow the cookies to cool entirely on a rack — they continue to firm up away from the heat. This profile makes the cookies versatile: they’re equally suited to an afternoon snack, an after-school treat, or a casual dessert paired with a scoop of ice cream.
Gathering Ingredients
Before you start:
Assemble everything on the counter so the build goes quickly and you don’t overwork the dough. I recommend measuring dry ingredients into small bowls and having the ripe bananas mashed in a bowl nearby. If you plan to add optional mix-ins, have them ready to fold in at the end.
Ingredient list:
- 1 cup creamy peanut butter
- 2 ripe bananas, mashed
- 1 large egg
- 1 cup rolled oats
- 1/4 cup brown sugar or honey
- 1 tsp vanilla extract
- 1/2 tsp baking powder
- Pinch of salt
- 1/3 cup chocolate chips (optional)
- 2 tbsp chopped peanuts for topping (optional)
Ingredient notes:
Choose creamy peanut butter for a smooth texture; natural peanut butters with separated oil may change dough consistency slightly, so stir them thoroughly before measuring. Very ripe bananas — those marked with brown speckles — bring more natural sweetness and moisture, which helps keep the cookies tender. Rolled oats create chew and body; quick oats will work in a pinch but will produce a softer, less toothsome texture. If you prefer to omit added sugar, the honey option integrates beautifully, offering a touch of floral sweetness and a bit more moisture. Consider toasting the chopped peanuts briefly for a more pronounced crunch and roasted flavor.
Preparation Overview
Strategy before you bake:
The whole process is about gentle handling and timing rather than precise technique. Start by ripening bananas until they’re sweet and fragrant; mashed fruit melds seamlessly with peanut butter to form a cohesive, sticky dough that doesn’t require flour. The goal is to combine wet ingredients until smooth, then fold in the dry components to just bring everything together. Over-mixing can lead to a denser texture, so aim for integration rather than perfect homogeneity.
Texture checkpoints:
You’re looking for a dough that holds its shape when scooped but still appears slightly glossy and tacky. If the dough seems too loose, a touch more oats will firm it; if it’s too stiff, a splash of mashed banana or a teaspoon of honey can soften it. When shaping, scoop tablespoon-sized mounds and flatten gently — that creates a cookie with a tender center and slightly crisp edge. Keep an eye on the oven during the final minutes; these cookies transform quickly from soft to set.
Timing and oven prep:
Preheat the oven and line your sheet with parchment to prevent sticking. Using a lined pan ensures an even underside and prevents the peanut butter from bonding to metal. Allow the cookies to rest on the sheet briefly after baking so they finish setting without over-baking. Small adjustments in oven temperature and bake time tweak the final chewiness, and I’ve included practical tips in the cooking section to help you hit your preferred texture.
Cooking / Assembly Process
Step-by-step instructions:
- Preheat the oven to 175°C (350°F) and line a baking sheet with parchment paper.
- In a large bowl, mash the ripe bananas with a fork until mostly smooth.
- Add the peanut butter, egg, brown sugar (or honey) and vanilla to the bananas and mix until well combined.
- Stir in the rolled oats, baking powder and a pinch of salt until a sticky dough forms.
- Fold in the chocolate chips if using, reserving a few to press on top of each cookie.
- Scoop tablespoon-sized portions of dough onto the prepared baking sheet, spacing them about 3 cm apart. Flatten slightly with the back of a spoon and press reserved chocolate chips and chopped peanuts on top if desired.
- Bake for 10–14 minutes, until the edges are golden and the centers are set. Baking time varies by oven, so keep an eye on them.
- Let the cookies cool on the baking sheet for 5 minutes, then transfer to a wire rack to cool completely. They firm up as they cool and stay soft and chewy.
- Store in an airtight container at room temperature for up to 3 days, or freeze for longer storage.
Pro tips while baking:
Use a tablespoon scoop for uniform cookies so they bake evenly. Pressing a few extra chocolate chips on top not only looks inviting but ensures visible pockets of melted chocolate when the cookies come out of the oven. Rotate the baking sheet halfway through the baking window if your oven runs hot on one side to encourage even browning. After removing the tray from the oven, allow the cookies to set on the parchment for the recommended rest — this final rest is crucial because the cookie centers continue to firm off heat, preserving a soft-chewy interior instead of turning dry.
Serving Suggestions
How to present and enjoy:
These cookies are most delightful when served warm, right after baking, when any chocolate chips are still molten and the centers feel luxuriously tender. Pair them with a cold glass of milk or a steaming cup of coffee for a classic combo. For a dessert twist, serve slightly cooled cookies alongside a scoop of vanilla ice cream or a dollop of whipped cream; the contrast between warm cookie and cold ice cream is irresistible.
Elevating the bite:
Sprinkle a pinch of flaky sea salt on top just before serving to enhance the peanut flavor and balance sweetness. If you like layered textures, sandwich two cookies with a smear of peanut butter or a thin spread of chocolate-hazelnut spread for an indulgent treat. For brunch or breakfast, serve with Greek yogurt and fresh fruit to add brightness and a tangy counterpoint to the cookie’s richness.
Portion and pairing ideas:
These cookies work well as grab-and-go snacks — pop one into a lunchbox or tote with a piece of fruit for a balanced nibble. If offering them at a gathering, arrange them on a platter with small bowls of additional toppings like chopped peanuts, extra chocolate chips, and honey for guests to customize. Their approachable flavor profile makes them versatile: upscale them slightly for entertaining or keep them simple for everyday comfort.
Storage & Make-Ahead Tips
Make-ahead and storage strategy:
These cookies are excellent candidates for make-ahead planning. Bake a batch and keep extras stored properly so you always have a ready snack. For short-term storage keep them in an airtight container at room temperature; separate layers with parchment if you stack them to prevent sticking. To refresh a cookie that has firmed up, a few seconds in the microwave (on a microwave-safe plate) will return a warm, soft texture reminiscent of freshly baked.
Freezing and thawing:
If you want to freeze for longer-term enjoyment, cool cookies completely before packing them into a freezer-safe container or bag. Use parchment to separate layers and remove as much air as possible before sealing. Thaw at room temperature or warm briefly in the oven to revive the soft center and melt any chocolate chips. This method keeps texture and flavor intact and makes the cookies a convenient make-ahead treat.
Tips for best results after storage:
When reheating, keep an eye on the time to avoid over-drying. If cookies seem dry after storage, serve them with a smear of extra peanut butter or a drizzle of honey to add moisture and gloss. For the best shelf life and texture, store away from strong-smelling foods since peanut butter can absorb aromas. Properly stored, these cookies remain a satisfying, reliable option for a quick sweet fix or a thoughtful baked gift.
Frequently Asked Questions
Q: Can I use natural peanut butter?
Yes — natural peanut butter can be used, but stir it thoroughly before measuring because separated oil affects consistency. The dough may be slightly looser; add a touch more oats if needed to reach a scoopable, tacky texture.
Q: What if I don’t have ripe bananas?
Ripe bananas lend sweetness and moisture. If your bananas are under-ripe, they will be less sweet and may alter texture; consider letting them ripen at room temperature or using a small amount of additional sweetener to balance flavor.
Q: Can I make these gluten-free?
Use certified gluten-free rolled oats to keep the recipe gluten-free. The texture will remain similar because oats contribute most of the structure.
Q: How do I adjust sweetness?
You can reduce the added sugar or choose honey instead. If you skip added sweetener entirely, consider using very ripe bananas and adding a pinch of cinnamon to enhance perceived sweetness.
Q: Can I omit the egg?
The egg acts as a binder and provides structure; for an egg-free version, try a flax or chia egg replacement, though texture may be slightly different — test one small batch to fine-tune the ratio.
Closing note:
These FAQs reflect the most common questions I receive when sharing this recipe. If you have a specific dietary need or want to try an unusual swap, reach out and I’ll suggest adjustments that preserve the signature soft, chewy texture. Thank you for baking along — enjoy experimenting and making the recipe your own.
Peanut Butter Banana Cookies
Ingredients
- Ripe bananas – 2 medium 🍌
- Peanut butter – 1 cup (240g) 🥜
- Rolled oats – 1 cup (90g) 🌾
- Honey or maple syrup – 2 tbsp 🍯
- Baking powder – 1/2 tsp 🧂
- Vanilla extract – 1 tsp 🍨
- Salt – pinch 🧂
- Chocolate chips (optional) – 1/4 cup 🍫
- Cinnamon (optional) – 1/2 tsp 🍂
Instructions
- Preheat oven to 180°C (350°F) and line a baking sheet with parchment paper.
- In a bowl, mash the bananas until mostly smooth 🍌.
- Add the peanut butter and honey, then mix until well combined 🥜🍯.
- Stir in the rolled oats, baking powder, vanilla, salt, and cinnamon until a thick batter forms 🌾🧂🍨.
- Fold in chocolate chips if using 🍫.
- Scoop tablespoon-sized portions onto the prepared sheet and gently flatten each cookie with a spoon.
- Bake for 10-12 minutes until edges are set and tops are lightly golden.
- Let cool on the baking sheet for 5 minutes, then transfer to a wire rack to finish cooling.