Peanut Butter Bars are the definition of effortless indulgence. Rich, creamy, chocolatey, and irresistibly satisfying, these classic dessert bars combine smooth peanut butter, buttery graham crackers, and a thick chocolate topping into a treat that tastes remarkably similar to a giant peanut butter cup.
With no oven required and minimal ingredients, peanut butter bars are perfect for busy bakers, beginner cooks, and anyone craving a quick, crowd-pleasing dessert. They are ideal for holidays, potlucks, bake sales, or anytime you need a guaranteed hit.
What Are Peanut Butter Bars?
Peanut Butter Bars are layered dessert bars consisting of:
- A peanut butter–based bottom layer
- A smooth chocolate topping
They are typically no-bake, set in the refrigerator, and sliced into squares once firm. Their simplicity and nostalgic flavor have made them a staple in American dessert culture for decades.
Why Peanut Butter Bars Are So Popular
These bars remain a favorite for several reasons:
- No baking required
- Pantry-friendly ingredients
- Quick preparation
- Kid-approved flavor
- Perfect balance of sweet and salty
They deliver bakery-level satisfaction with minimal effort.
Peanut Butter Bars vs. Peanut Butter Fudge
While similar, peanut butter bars:
- Have a firmer, sliceable texture
- Use graham crackers for structure
- Feature a thinner, snappier chocolate layer
This makes them easier to serve and transport.
Key Ingredients Explained
Peanut Butter
Creamy peanut butter works best. Avoid natural peanut butter, which can separate and affect texture.
Butter
Melted butter binds the base and adds richness.
Powdered Sugar
Sweetens the bars while keeping the texture smooth.
Graham Cracker Crumbs
Provides structure and subtle crunch.
Chocolate Chips
Semi-sweet chocolate offers the perfect balance against the sweet peanut butter.
Why This Recipe Works Every Time
- No baking errors
- Simple ratios
- Foolproof layering
- Sets reliably in the fridge
Even first-time dessert makers achieve perfect results.
Classic No-Bake Peanut Butter Bars Recipe
Ingredients
- 1 cup creamy peanut butter
- ½ cup unsalted butter, melted
- 2 cups powdered sugar
- 1 ½ cups graham cracker crumbs
- 1 ½ cups semi-sweet chocolate chips
Instructions
- Line a 9×13-inch pan with parchment
- Mix peanut butter and melted butter
- Stir in powdered sugar
- Add graham cracker crumbs
- Press mixture firmly into pan
- Melt chocolate chips
- Spread chocolate evenly on top
- Chill 1–2 hours until set
- Slice and serve
How to Get Perfect Layers
- Press the peanut butter layer firmly
- Use an offset spatula for chocolate
- Chill completely before cutting
This ensures clean, professional-looking bars.
Texture and Flavor Profile
Peanut Butter Bars are:
- Creamy yet firm
- Rich but not overwhelming
- Sweet with a salty finish
- Smooth with a slight crunch
They satisfy dessert cravings quickly and completely.
Common Mistakes to Avoid
- Using natural peanut butter
- Not pressing the base firmly
- Overheating chocolate
- Cutting before fully chilled
Avoiding these ensures flawless bars.
Popular Peanut Butter Bar Variations
Chocolate Peanut Butter Fudge Bars
Add an extra chocolate layer on top.
Peanut Butter Pretzel Bars
Mix crushed pretzels into the base.
Dark Chocolate Peanut Butter Bars
Use dark chocolate for a richer flavor.
No-Sugar Peanut Butter Bars
Use sugar-free powdered sweetener.
Holiday Peanut Butter Bars
Add festive sprinkles or drizzle white chocolate.
How to Cut Peanut Butter Bars Cleanly
- Chill thoroughly
- Use a sharp knife
- Wipe blade between cuts
For extra clean edges, warm the knife slightly.
How to Store Peanut Butter Bars
Refrigerator
Store in an airtight container up to 7 days.
Freezer
Freeze for up to 3 months. Thaw before serving.
Room Temperature
Only for short periods (1–2 hours).
Make-Ahead Dessert Perfection
Peanut Butter Bars are ideal for prepping in advance:
- Make 1–2 days ahead
- Store chilled
- Slice just before serving
Their flavor improves as they set.
Perfect Occasions for Peanut Butter Bars
- Bake sales
- Potlucks
- Holiday trays
- Lunchbox treats
- After-dinner desserts
They are easy to transport and universally loved.
Why Homemade Peanut Butter Bars Beat Store-Bought
Homemade bars:
- Use real ingredients
- Taste fresher
- Are customizable
- Cost less
- Have better texture
Once you make them at home, packaged versions fall short.
Frequently Asked Questions
Can I make these gluten-free?
Yes—use gluten-free graham crackers.
Can I reduce the sugar?
Slightly, but texture may soften.
Do they need refrigeration?
Yes, for best structure and safety.
Final Thoughts
Peanut Butter Bars are a timeless dessert that proves simplicity often delivers the biggest reward. With minimal ingredients and maximum flavor, they are perfect for any occasion. Whether you keep them classic or experiment with variations, these bars deserve a permanent spot in your dessert rotation.
Print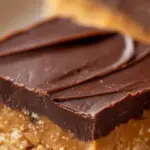
Peanut Butter Bars: The Ultimate No-Bake Dessert Everyone Loves
Ingredients
• 1 cup (250g) natural creamy peanut butter (unsweetened, oil-separated—stir well)
• ½ cup (120ml) pure maple syrup or honey
• 2 tbsp coconut oil (or butter for richness)
• 1½ cups (135g) old-fashioned rolled oats
• ¼ cup (25g) ground flaxseed (for fiber & binding—optional but recommended)
• ¼ tsp sea salt
• ½ tsp vanilla extract
• Optional mix-ins:
– ⅓ cup mini dark chocolate chips
– 2 tbsp chia seeds
– Pinch of cinnamon
Instructions
- Line an 8×8″ pan with parchment (overhanging edges for easy lift).
- In a saucepan over low heat, warm peanut butter, maple syrup, and coconut oil, stirring until smooth and glossy (2–3 min). Remove from heat.
- Stir in vanilla and salt. Add oats, flaxseed, and any optional mix-ins—mix until fully coated.
- Press mixture very firmly into pan (use a flat-bottomed glass or spatula—this prevents crumbly bars!).
- Chill 2+ hours (or freeze 45 min) until set. Lift out, slice into 12 bars.
- Store airtight in fridge up to 2 weeks (they firm and improve with time!). For grab-and-go, wrap individually.
PREP TIME & NUTRITION (per bar, makes 12):
Prep Time: 10 min | Cook Time: 3 min | Total Time: 2 hr 15 min (mostly chilling) | Servings: 12 | Calories: 180 | Net Carbs: 12g | Fats: 11g | Protein: 5g