Introduction
A celebration-ready centerpiece
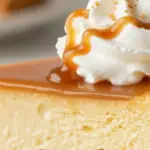
This salted caramel shortbread cheesecake is the kind of dessert that pauses a room: it combines a delicate, crisp base with a glossy, sweet-salty ribbon and a cloudlike, whipped filling. As a food writer and recipe creator, I love desserts that balance comfort and showmanship — this one does both effortlessly. It has an approachable assembly that yields a finish which looks like you spent all afternoon fussing when in reality the technique is straightforward when planned.
Whether you make it for birthdays, holiday tables, or an indulgent weekend, the texture contrasts make every forkful memorable. The crust gives a satisfying snap, the middle offers molten silk, and the top finishes with airy cream that cuts through the richness. In this article I’ll walk you through the reasoning behind each component, the best workflow to keep your sanity, and practical tips to help you achieve clean slices and a glossy finish.
What to expect from this guide
- Clear ingredient breakdown so you can shop confidently
- A stepwise assembly plan to stage work efficiently
- Troubleshooting and storage tips to keep it tasting fresh
Why You’ll Love This Recipe
Crowd-pleasing with minimal fuss
This cheesecake is built for celebration without the stress. The construction lends itself to being made ahead, which is invaluable when hosting: most of the hands-on work is concentrated into a single prep day and then the refrigerator does the rest. The combination of lush mouthfeel and a restrained sweetness profile is what turns curious first-timers into repeat bakers — it’s rich but never cloying, and the contrast of textures keeps each bite interesting.
Beyond the sensory appeal, there are practical reasons to love it: the components are pantry-friendly and familiar, and the method scales well if you want to double or halve for a smaller gathering. Small tricks — like ensuring smooth, lump-free filling and an even crust press — elevate the finished cake from good to exceptional. I also appreciate that garnishing is forgiving: a casual dusting or ribbon of sauce instantly dresses the dessert for company.
Finally, it’s a dessert that photographs beautifully for menus and social posts. The strong horizontal layers read well in slices, and the high-contrast finishing touches bring out those glossy highlights that say “indulgence.”
Flavor & Texture Profile
A layered sensory experience
Think of this cake as three distinct experiences in one forkful: an initial crispness, a rich silken middle, and a lifted, airy finish. The base gives structure and an immediate buttery crunch that provides a satisfying counterpoint to the silkier middle layer. The central ribbon adds the luscious density and the sweet-salty interplay that keeps the overall richness bright rather than heavy. Finally, the whipped top introduces softness and lightness, creating a clean palate for the next bite.
When you taste it, watch for the way temperature changes the components: the chilled filling is creamy and slightly firm; as it warms on the tongue, the middle becomes more fluid and the flavors open up. The contrast in mouthfeel — snap, silk, and cloud — is essential to the dessert’s appeal. Texture-wise, aim for a crust that holds together without being hard, a middle that slices cleanly but is not rock-solid, and a top that yields with a soft peak.
For balance, consider finishing touches that emphasize contrast: a small flake of finishing salt, a restrained ribbon of sauce, or a scatter of crumbs to add visual texture. Those little accents elevate both flavor complexity and the overall eating experience.
Gathering Ingredients
Everything to pull together before you start
Below is the complete ingredient list to ensure a smooth, focused prep. Lay out each component so you can move through the steps without scrambling. Check your equipment too — a springform pan and a reliable thermometer are especially helpful for consistent results.
- Shortbread crumbs — 2 cups (240 g)
- Unsalted butter, melted — 6 tablespoons (84 g)
- Unsalted butter (for caramel) — ½ cup (113 g)
- Sweetened condensed milk — 7 ounces (≈198 g)
- Heavy whipping cream (for caramel) — ¼ cup (59.5 g)
- Light corn syrup — ¼ cup (85 g)
- Light brown sugar, packed — ½ cup (100 g)
- Kosher salt (for caramel) — ¼ teaspoon
- Vanilla extract (for caramel) — ¼ teaspoon
- Cream cheese, room temperature — 3 blocks (8 oz each / 680 g total)
- Granulated sugar — 1 cup (200 g)
- Vanilla extract (for cheesecake) — 2 teaspoons
- Kosher salt (for cheesecake) — ¼ teaspoon
- Heavy whipping cream (for cheesecake) — 2 ¼ cups (535.5 g)
- Whipped topping, for garnish — as needed
- Extra shortbread crumbs, for garnish — as needed
- Caramel sauce, for drizzling — as needed
Pro tip
Organize ingredients in the order they are used and group similar items together. Place refrigerated items at the edge of your prep area so they’re easy to return to the fridge between steps.
Preparation Overview
Plan the work, then work the plan
A calm timeline is the secret to a polished result. Begin by clearing a dedicated workspace and lining your pan so assembly is straightforward. Staging is everything: one area for dry components, one for chilled elements, and another for hot work like making caramel. This keeps cross-contamination and temperature swings to a minimum.
Think in terms of parallel tasks. While one component is chilling, prepare another. Use small bowls for mise en place so you can move quickly between steps without hunting for a missing pinch or measuring cup. If your mixer has multiple attachments, match the beater to the task before you start — changing tools mid-assembly is a time sink.
Temperature management matters. Cool surfaces and cold bowls help stabilise whipped elements, while room-temperature components blend more smoothly. For a stress-free finish, do your final assembly with clean, dry utensils and keep an extra spatula and bowl on hand for any last-minute smoothing. Finally, have a warm knife in hot water ready for slicing at serving time; it makes for cleaner edges and a more elegant presentation.
Cooking / Assembly Process
Step-by-step assembly and cooking instructions
- Prepare a 9-inch (23 cm) springform pan: spray with nonstick spray and line the bottom with parchment paper.
- Make the shortbread crust: combine shortbread crumbs and 6 tablespoons melted butter; mix with a fork until crumbs are evenly coated.
- Press the crumb mixture firmly and evenly into the bottom of the prepared springform pan; set aside.
- Make the caramel: in a large saucepan over medium heat melt ½ cup butter, then add sweetened condensed milk, ¼ cup heavy cream, corn syrup, light brown sugar, ¼ tsp salt and ¼ tsp vanilla; stir to combine.
- Continue cooking the caramel, stirring constantly, until it reaches 236°F (soft-ball stage), about 15–18 minutes — be careful, the caramel will be very hot.
- Pour the hot caramel over the pressed shortbread crust and spread to an even layer; refrigerate until completely cool and set, about 90 minutes.
- Prepare the cheesecake filling: beat room-temperature cream cheese, granulated sugar, 2 tsp vanilla and ¼ tsp salt on medium speed until smooth and creamy, scraping the bowl as needed.
- Switch to the whisk attachment; with the mixer on low, pour in the 2¼ cups heavy whipping cream, then increase speed to high and whip until the mixture holds stiff peaks, about 3–5 minutes.
- Pour the whipped cheesecake filling over the cooled caramel layer and smooth the top with a spatula.
- Chill the assembled cheesecake in the refrigerator until firm, at least 6 hours or overnight for best texture.
- Before serving, garnish with whipped topping, extra shortbread crumbs and a drizzle of caramel sauce; run a warm knife around the pan before releasing the springform for clean slices.
Technique notes
When making the caramel, stir constantly and use a heavy-bottomed pan to prevent hot spots. Keep a reliable thermometer on hand to monitor temperature accurately. For the filling, full incorporation and smoothness come from scraping the bowl and ensuring your cream cheese is pliable. When pouring the filling, work steadily and avoid overworking the whipped mixture to maintain those light peaks. Finally, chilling thoroughly is what allows clean slicing and a smooth cross-section.
Serving Suggestions
Presentation ideas to delight guests
A little restraint goes a long way when plating slices from this cake. Clean slices are the star: after releasing the pan, wipe a knife between cuts using a warm, damp cloth to keep edges sharp. For a simple but elegant finish, add a small piped rosette of whipped topping at the edge of each slice and a delicate drizzle of sauce across the top for contrast.
If you want to dress things up for a special occasion, serve slices on neutral, matte plates that make the glossy elements pop. Add a tiny crumble scatter near the edge for texture and visual interest. When serving multiple people, stagger slices on a long platter with microgreens or edible flowers tucked into the negative space to elevate the presentation without overpowering the flavor.
Pairing ideas lean toward beverages that can cut through richness: bright, acidic coffee preparations or sparkling wine are classic companions. For a non-alcoholic route, consider a lightly brewed tea or a citrus-forward sparkling drink that refreshes the palate between bites. Small contrasts — a citrus note, an acidic beverage, or a slightly bitter coffee — will make each bite feel balanced and memorable.
Storage & Make-Ahead Tips
Keep it tasting fresh for days
This cheesecake is forgiving when it comes to make-ahead planning. Assemble it in advance and keep it chilled until serving; doing so reduces day-of stress and actually improves sliceability. When storing, keep the cake in an airtight environment to protect it from absorbing strong odors and to maintain a smooth surface. Use a cake server with a thin blade to lift slices cleanly for best presentation.
If you plan to freeze portions, wrap slices tightly in plastic and then in foil to prevent freezer burn. Thaw slowly in the refrigerator to preserve texture and avoid condensation forming on the surface. When unwrapping after thawing, remove coverings gently and let the slices breathe a little before serving to regain a pleasant mouthfeel.
For last-minute salvage: if the surface shows slight moisture after refrigeration, a brief run of a warm knife around each slice will restore clean lines. Keep garnishes separate until serving; delicate decorations lose their visual impact when left on during long storage. Finally, always bring the cake out of strict chill just a short while before serving to allow flavors to open and textures to soften slightly for the best eating experience.
Frequently Asked Questions
Common questions from home bakers
- Can I make substitutions?
Many bakers ask about swaps. While some alternatives can work, they often change texture and balance. If you are considering a different sweetener or a lighter dairy option, test a small batch first to see how structure and mouthfeel respond. - What causes a grainy filling?
Graininess typically comes from insufficiently softened elements or overbeating after adding cold ingredients. Ensuring components are at the appropriate temperature and incorporating them gently usually restores silkiness. - How do I get a glossy caramel?
Gloss comes from even cooking and careful stirring. Use a heavy-bottomed pan to avoid hot spots, and monitor the caramel closely toward the end of cooking so it reaches the desired stage without scorching. - Can I refrigerate overnight or make ahead?
Yes — advance assembly is one of the recipe’s strengths. Completing most of the work ahead reduces day-of rush and can improve texture as the layers settle and bond. - How do I slice perfectly clean pieces?
A warm, sharp knife and wiping between cuts are your best friends. Heat the blade briefly under warm water, dry it, then make a single smooth cut; repeat warming and wiping as needed for each slice.
Still have a question?
If something specific came up in your bake — a texture you didn’t expect or a timing detail that felt off — describe what you observed and I’ll help troubleshoot step-by-step.
Salted Caramel Shortbread Cheesecake
Ingredients
- Shortbread crumbs — 2 cups (240 g) 🍪
- Unsalted butter, melted — 6 tablespoons (84 g) 🧈
- Unsalted butter (for caramel) — ½ cup (113 g) 🧈
- Sweetened condensed milk — 7 ounces (≈198 g) 🥛
- Heavy whipping cream (for caramel) — ¼ cup (59.5 g) 🥛
- Light corn syrup — ¼ cup (85 g) 🍯
- Light brown sugar, packed — ½ cup (100 g) 🍬
- Kosher salt (for caramel) — ¼ teaspoon 🧂
- Vanilla extract (for caramel) — ¼ teaspoon 🌼
- Cream cheese, room temperature — 3 blocks (8 oz each / 680 g total) 🧀
- Granulated sugar — 1 cup (200 g) 🍚
- Vanilla extract (for cheesecake) — 2 teaspoons 🌼
- Kosher salt (for cheesecake) — ¼ teaspoon 🧂
- Heavy whipping cream (for cheesecake) — 2 ¼ cups (535.5 g) 🥛
- Whipped topping, for garnish — as needed 🍦
- Extra shortbread crumbs, for garnish — as needed 🍪
- Caramel sauce, for drizzling — as needed 🍯
Instructions
- Prepare a 9-inch (23 cm) springform pan: spray with nonstick spray and line the bottom with parchment paper.
- Make the shortbread crust: combine shortbread crumbs and 6 tablespoons melted butter; mix with a fork until crumbs are evenly coated.
- Press the crumb mixture firmly and evenly into the bottom of the prepared springform pan; set aside.
- Make the caramel: in a large saucepan over medium heat melt ½ cup butter, then add sweetened condensed milk, ¼ cup heavy cream, corn syrup, light brown sugar, ¼ tsp salt and ¼ tsp vanilla; stir to combine.
- Continue cooking the caramel, stirring constantly, until it reaches 236°F (soft-ball stage), about 15–18 minutes — be careful, the caramel will be very hot.
- Pour the hot caramel over the pressed shortbread crust and spread to an even layer; refrigerate until completely cool and set, about 90 minutes.
- Prepare the cheesecake filling: beat room-temperature cream cheese, granulated sugar, 2 tsp vanilla and ¼ tsp salt on medium speed until smooth and creamy, scraping the bowl as needed.
- Switch to the whisk attachment; with the mixer on low, pour in the 2¼ cups heavy whipping cream, then increase speed to high and whip until the mixture holds stiff peaks, about 3–5 minutes.
- Pour the whipped cheesecake filling over the cooled caramel layer and smooth the top with a spatula.
- Chill the assembled cheesecake in the refrigerator until firm, at least 6 hours or overnight for best texture.
- Before serving, garnish with whipped topping, extra shortbread crumbs and a drizzle of caramel sauce; run a warm knife around the pan before releasing the springform for clean slices.