Introduction
A hungry moment doesn’t always call for a full oven or a long prep session.
As a professional food writer I’ve come to adore recipes that solve cravings with minimal fuss and maximum satisfaction. This single-serve mug pizza is one of those small culinary miracles: it’s compact, instantly comforting, and engineered for speed without sacrificing the elements that make pizza so universally loved.
What I love most about this style of microwave pizza is how it honors the basics — a tender quick-bread base, a layer of bright tomato sauce, and a melty crown of cheese — while staying incredibly forgiving. The technique is approachable for anyone who’s ever measured into a bowl and stirred, and it’s especially useful for solo cooks, dorm-room chefs, or those mid-day snackers who crave something warm and savory but don’t want leftovers.
In this piece I’ll walk you through why this mug pizza works, how to assemble it so textures are balanced, and share pro tips that lift it beyond ‘just microwave food.’ Whether you’re after weekday convenience or an emergency pizza fix, consider this your friendly blueprint for an instant, satisfying bite that still feels homey.
Read on for ingredient guidance, a clear step-by-step assembly process, and ideas for serving and storing. Every tip is aimed at helping you get reliably good results every single time.
Why You’ll Love This Recipe
This mug pizza is the kind of recipe you keep coming back to for its simplicity, speed, and forgiving nature.
I write about quick recipes all the time, and few strike a balance between comfort and convenience as cleanly as this one. It doesn’t require special equipment beyond a microwave-safe mug, and the method turns pantry staples into something that reads like an intentional snack rather than last-resort food. That sense of intentionality is important: with just a little attention to layering and timing, you end up with a tender base and properly melted cheese rather than a rubbery, overcooked blob.
This recipe scales to the rhythm of modern life. It’s perfect for moments when you want hot, cheesy satisfaction without the commitment to preparing a whole pizza. It’s also adaptable for dietary preferences: swap cheeses, use a different sauce, or add fresh herbs at the end for brightness. For folks living solo, the beauty is obvious — no wasted slices, no reheating a whole pie later.
On a practical level, it’s also a useful culinary lesson: when you make one portion mindfully, you learn how ingredients behave in small batches. That knowledge translates to better technique across other quick-bake recipes. This recipe rewards small experiments — a different spice blend, a sprinkle of herbs, or a touch of extra oil — and those tweaks make it feel like your own personal pizza.
Flavor & Texture Profile
Think of this mug pizza as a condensed pizza experience where texture and contrast are everything.
On first bite you should notice a soft, slightly breadlike base that yields easily to the toppings. Because the base cooks fast and in a confined space, the interior stays moist while the exposed edges may set just enough to offer a gentle chew — not a crisp crust, but a pleasant, tender bite that supports the sauce and cheese. The sauce provides bright, tomato-forward acidity and a concentrated hit of savory umami; it acts as the flavor bridge between base and cheese. The cheese, when melted properly, should be gooey and cohesive, forming strings and patches of molten silk rather than cooling into a compact block.
The seasoning layer — a hint of dried Italian herbs — adds aromatic lift, while the pepperoni contributes a cured, slightly spiced note and a touch of fat that rounds out every mouthful. Texture contrasts are small but crucial: the dough’s soft crumb, the sauce’s smoothness, the cheese’s stretch, and the pepperoni’s chew all play together to create an impression of fullness and satisfaction.
Taste-wise, this is a comforting, savory profile with a bright tomato anchor and a rich, creamy finish. A drizzle of oil or a scatter of fresh herbs after cooking will add another dimension: the oil brings silkiness and aroma, while herbs bring freshness. That final little flourish is what turns a quick microwave snack into a complete taste experience.
Gathering Ingredients
Assemble everything before you begin to keep the process fast and tidy.
Below is an exact ingredient list so you can gather each item at once. I recommend measuring and arranging ingredients within arm’s reach of your workspace to streamline the quick assembly.
- 6 tablespoons all-purpose flour
- 1/8 teaspoon salt
- 1/16 teaspoon baking soda
- 1/8 teaspoon baking powder
- 5 tablespoons water
- 1 tablespoon olive oil
- 1 1/2 tablespoons prepared pizza sauce
- 2 1/2 tablespoons shredded mozzarella cheese
- Pinch (about 1/16 teaspoon) dried Italian seasoning
- 6–8 mini pepperoni slices
- 12-ounce microwave-safe mug
Beyond the list, a few sourcing notes from my test kitchen: choose a fine all-purpose flour for an even, tender crumb; a coarsely milled flour will change the texture and hydration behavior. Use a prepared pizza sauce that you enjoy straight from the jar — its seasoning will carry through the small dish, so balance of acidity and herbs matters. For cheese, freshly shredded mozzarella melts more evenly than pre-shredded varieties that contain anti-caking agents; whenever possible, shred from a block for a silkier melt. If your pepperoni is very thick, consider slicing it thinner so it heats quickly and crisps at the edges.
Finally, pick a sturdy 12-ounce microwave-safe mug with vertical sides; it helps the batter rise evenly and keeps everything contained during cooking. Having everything measured and ready makes the entire preparation feel effortless and keeps the microwave cooking time accurate.
Preparation Overview
Before you start cooking, understand the flow: dry ingredients, wet integration, topping layering, and a brief microwave finish.
This recipe’s simplicity is elegant because it relies on consistent steps rather than complex technique. The dry mix creates a light structure for the quick bread base; proper mixing of wet ingredients into the dry components ensures an even crumb without pockets of flour. When the batter is smoothed into the mug, aim for an even layer so the sauce and cheese sit uniformly across the surface. Layering is more than convenience — it’s how you manage moisture. Placing the sauce over the batter gives the tomato flavor direct contact with the base while keeping the cheese from sinking in. The cheese should be distributed to allow even melting and to catch the heat across the top surface during the short cooking burst.
In terms of timing, the method uses a short, high-heat cook that relies on the microwave’s quick energy to set the base and melt the toppings rapidly. Because microwaves differ, the visual cues matter: look for the cheese to start melting and the base to rise slightly and look set at the edges. A brief additional heat interval after adding cold toppings helps them warm through without overcooking the base.
Finally, cooling briefly before eating is an overlooked but important step. A short rest allows internal steam to redistribute and for the cheese to settle, which makes for a safer, more pleasant bite. These small technique choices are what turn a convenience recipe into something reliably delicious.
Cooking / Assembly Process
Follow the steps below exactly as written to recreate the quick microwave method in your own kitchen.
- In a 12-ounce microwave-safe mug, add the all-purpose flour, salt, baking soda, and baking powder; stir to combine until the dry mix is uniform.
- Pour the water and olive oil into the mug with the dry ingredients and mix thoroughly until no lumps remain and the batter is evenly smooth; level the batter into an even layer in the mug.
- Spread the prepared pizza sauce evenly over the batter in the mug, then sprinkle the shredded mozzarella cheese over the sauce and finish with a pinch of dried Italian seasoning.
- Microwave the mug on high power for 1 minute and 15 seconds; the base should rise slightly and the cheese should begin to melt.
- Remove the mug, arrange the mini pepperoni slices on top of the melting cheese, then return to the microwave for an additional 15 seconds to warm the pepperoni.
- Allow the mug pizza to rest for about 1 minute to cool slightly and let the cheese set before eating. Caution: contents will be very hot.
These steps were tested for balance of texture and timing: the initial cook time sets the batter and starts cheese melt without drying the base, while the short second burst heats the pepperoni so it releases a little of its fat and aromatics without overcooking. If you notice uneven melting or a slightly under-set center after the first interval, a few additional seconds (in small increments) will finish the job — but be cautious, as microwave power varies widely. Visual cues — a gently risen base, cheese that’s glossy and starting to stretch, and steam lifting from the mug — are your best indicators that the process is complete. This is a hands-on, quick method; staying nearby during the brief cooking windows ensures the ideal balance between a moist base and properly melted toppings.
Serving Suggestions
Presentation matters even for a single-serve mug pizza — small touches elevate the experience.
When you remove the mug from the microwave and after a brief rest, I recommend a few finishing gestures that add brightness, texture, and aroma. A quick scatter of fresh herbs brings immediate lift: basil or a tiny pinch of oregano offers a fragrant contrast to the melted cheese. A light drizzle of good olive oil adds shine and a silky mouthfeel; just a few drops will make the top feel more luxurious without weighing it down. If you like heat, a few flakes of crushed red pepper or a whisper of chili oil adds warmth without overwhelming the modest scale of the dish.
For a composed bite, use a fork and knife straight from the mug, or invert the mug briefly onto a small plate so the pizza sits on its side — this makes it easier to access the base and can create a slightly crisper exposed edge. Pair the mug pizza with something crisp and bright on the side to contrast the soft interior: a small salad with lemon vinaigrette or quick pickled cucumber slices works very well.
If serving to company as a novelty treat, consider offering a selection of finishing garnishes in small bowls — fresh herbs, chili flakes, extra sauce, and a sprinkle of grated Parmesan — so each person can personalize their single serving. These minimal additions transform a speedy snack into a little ritual and make the dish feel considered and complete.
Storage & Make-Ahead Tips
This mug pizza shines as a fresh, immediate snack; but if you need to plan ahead, there are sensible ways to manage leftovers and prep.
Because this is designed as a single, just-cooked portion, the best results come from eating it fresh. If you do have leftovers, transfer cooled pieces into an airtight container and refrigerate promptly. Reheating is possible but expect changes in texture: the breadlike base will be denser and the cheese will set differently. To reheat, use short microwave bursts on low power while checking frequently, or rewarm in a toaster oven where a little crisping of the edges can partially restore textural contrast.
For make-ahead convenience, consider prepping the dry mix (flour, salt, leaveners) in a small jar so you only add wet ingredients and toppings at the time of cooking. Alternatively, assemble the batter portion into a sealed container and keep it chilled for a short period; note that wet batters don’t store as long as dry mixes, so use this approach only for brief holding times. Prepare toppings — shredded cheese and pepperoni slices — in separate small containers so you can top and heat quickly.
If you plan to batch-make several single servings sequentially, stagger assembly and cook one at a time to maintain optimal texture. For storage beyond a day, freezing is possible but not ideal: the small portion can become soggy on thawing and will lose the immediate fresh-cheese character. When in doubt, treat this as an on-demand recipe best enjoyed right away, and use simple prep steps to shave minutes off the assembly when you need speed.
Frequently Asked Questions
I’ve collected answers to the most common questions readers ask after trying this mug pizza — practical troubleshooting and small upgrades to improve results.
- Can I use a different cheese? Yes. Freshly shredded mozzarella gives the best melt, but a blend with provolone or mild cheddar can add flavor. Avoid pre-shredded cheeses with anti-caking agents if you want a silkier melt.
- What if my microwave is more or less powerful? Visual cues are key: look for the base to rise slightly and the cheese to begin melting. Adjust in small increments if needed, but be cautious — microwaves vary a lot.
- Can I make this without pepperoni? Absolutely. Substitute with other quick-cook toppings like pre-cooked sausage, sautéed mushrooms, or diced bell pepper; add delicate toppings after the initial cook and give a brief warm-through interval.
- Is the mug important? Use a sturdy microwave-safe mug with vertical sides to help the batter set and rise evenly. Very wide or very shallow containers change cook dynamics.
- How do I avoid a soggy base? Ensure the batter is mixed to an even consistency and spread in a uniform layer; layering the sauce rather than mixing it into the batter helps preserve structure. Let the mug rest briefly after cooking so steam dissipates.
In closing, this recipe is intentionally simple yet flexible. Small adjustments — a better-quality sauce, freshly shredded cheese, or a final drizzle of oil — make a big difference to the finished bite. If you have a specific variation in mind or run into an unexpected texture issue, let me know the details and I’ll offer targeted troubleshooting. Happy microwaving — and enjoy that quick, cheesy comfort without the fuss.
Print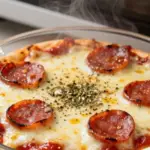
Pizza in a Mug (Single-Serve)
Ingredients
- 6 tablespoons all-purpose flour 🌾
- 1/8 teaspoon salt 🧂
- 1/16 teaspoon baking soda 🧪
- 1/8 teaspoon baking powder 🧁
- 5 tablespoons water 💧
- 1 tablespoon olive oil 🫒
- 1 1/2 tablespoons prepared pizza sauce 🍅
- 2 1/2 tablespoons shredded mozzarella cheese 🧀
- Pinch (about 1/16 teaspoon) dried Italian seasoning 🌿
- 6–8 mini pepperoni slices 🍕
- 12-ounce microwave-safe mug ☕
Instructions
1. Make the crust:
- In a large microwave-safe mug (12+ oz capacity—batter rises!), whisk your chosen base ingredients until smooth.
- Microwave 30 seconds on HIGH. (This pre-sets the crust so toppings don’t sink.)
2. Layer toppings:
- Spread pizza sauce over warm crust.
- Sprinkle ⅔ of cheese, then toppings, then remaining cheese (cheese-on-top prevents sogginess).
- Sprinkle with oregano and garlic powder.
3. Microwave:
- 60–90 seconds on HIGH until cheese is bubbly and edges pull slightly from mug.
- ⚠️ Watch closely at 60 sec—ovens vary! Overcooking = rubbery cheese.
4. Rest & serve:
- Let sit 1 minute (continues cooking + prevents burns).
- Run a butter knife around edges; invert onto a plate OR eat straight from the mug!
💡 Pro Tips for Best Results:
✅ Use a LARGE mug—batter expands 2x; small mugs = overflow disaster.
✅ Low-moisture mozzarella—pre-shredded bagged cheese works better than fresh (less water).
✅ Pre-cook watery veggies—microwave mushrooms/peppers 30 sec first to remove moisture.
✅ Crisp the top (game-changer!): After microwaving, place mug under a broiler 1–2 minutes until golden (watch closely!).
✅ Low-carb/keto version (you love this!): Almond flour base creates a tender, bread-like texture. Net carbs: ~3g.
✅ High-protein boost (you love this!): Oat flour + egg + Greek yogurt base delivers 10g protein.
✅ Flavor hack: Add ¼ tsp onion powder + pinch of red pepper flakes to sauce for depth.