When it comes to convenient and healthy snacks, protein bars are a versatile and satisfying option for athletes, busy professionals, and health-conscious individuals alike. Whether you’re looking for a quick breakfast, a post-workout boost, or a midday energy pick-me-up, protein bars can be tailored to fit your dietary needs and taste preferences. While store-bought options often contain artificial ingredients, excessive sugar, or unwanted additives, homemade protein bars allow you to control the ingredients and create a bar that’s perfectly suited to your goals—whether you’re following a keto, vegan, low-carb, or gluten-free lifestyle. In this article, we’ll guide you through everything you need to know about making delicious, nutritious protein bars at home, including tips, variations, and serving suggestions. By the end, you’ll have a foolproof recipe for a snack that’s as wholesome as it is indulgent.
Why You’ll Love Homemade Protein Bars
1. Customizable for Every Diet
Whether you’re vegan, keto, paleo, or simply looking for a clean-eating option, these bars can be adapted to suit your dietary preferences.
2. Low-Carb and Keto-Friendly Option
By using low-carb sweeteners like erythritol or monk fruit and avoiding grains, these bars can be tailored to fit into a keto or low-carb diet.
3. Packed with Protein
With the addition of protein powder, nuts, seeds, or nut butters, these bars provide a powerful protein punch to keep you full and energized.
4. No Artificial Ingredients
Homemade bars let you avoid the preservatives, artificial flavors, and excess sugar found in many store-bought options.
5. Easy to Make
With no baking required and simple pantry staples, these bars come together quickly and are perfect for meal prep or last-minute snacking needs.
Ingredients You’ll Need
Here’s what you’ll need to make customizable Protein Bars:
For the Base:
- 1 cup nuts or seeds (e.g., almonds, cashews, sunflower seeds)
- 1/2 cup nut butter (e.g., almond butter, peanut butter, or tahini)
- 2 tablespoons natural sweetener (e.g., maple syrup, honey, or sugar-free syrup like monk fruit)
- 1 teaspoon vanilla extract
- Pinch of salt
For the Protein Boost:
- 1/4 cup protein powder (choose based on your diet: whey, plant-based, collagen, etc.)
Optional Add-Ins:
- 2 tablespoons chia seeds, flaxseeds, or hemp seeds
- 2 tablespoons cacao nibs or sugar-free chocolate chips
- 1/4 teaspoon ground cinnamon or matcha powder
- 1/4 cup dried fruit (e.g., cranberries, raisins, or chopped dates)
Step-by-Step Instructions
Step 1: Prepare the Base
- In a food processor, pulse the nuts or seeds until they’re coarsely chopped but not turned into flour.
- Add the nut butter, sweetener, vanilla extract, and salt. Pulse again until the mixture starts to clump together.
Step 2: Add Protein and Mix-Ins
- Add the protein powder and any optional mix-ins like seeds, cacao nibs, or dried fruit.
- Process until the mixture forms a dough-like consistency. If it’s too dry, add a splash of nut milk; if too sticky, add a bit more protein powder or nuts.
Step 3: Shape the Bars
- Line an 8×8-inch square pan with parchment paper.
- Press the mixture evenly into the pan, smoothing the top with a spatula or the back of a spoon.
Step 4: Chill
Refrigerate the bars for at least 1–2 hours, or until firm.
Step 5: Slice and Serve
Once firm, lift the mixture out of the pan using the parchment paper overhang. Cut into bars or squares and serve chilled or at room temperature.
Tips for the Best Protein Bars
- Choose High-Quality Protein Powder : Opt for unflavored or flavored protein powder that complements your other ingredients (e.g., vanilla or chocolate).
- Adjust Sweetness : Start with a smaller amount of sweetener and adjust to your preference, especially if pairing with naturally sweet ingredients like dried fruit.
- Make Ahead : These bars can be made ahead of time and stored in an airtight container in the refrigerator for up to 1 week.
- Freeze for Convenience : Store sliced bars in a freezer-safe container for up to 3 months. Thaw in the refrigerator before serving.
- Experiment with Flavors : Try adding spices like cinnamon, cocoa powder, or matcha for variety.
Variations to Try
While the classic version is divine, here are some creative twists to try:
- Chocolate-Coated Bars : Melt sugar-free dark chocolate and drizzle it over the bars for an indulgent touch.
- Peanut Butter Bliss Bars : Use peanut butter instead of almond butter and fold in sugar-free chocolate chips.
- Tropical Bars : Add shredded coconut, dried mango, and macadamia nuts for a tropical flair.
- Berry Almond Bars : Fold in dried cranberries or raspberries and top with slivered almonds for added crunch.
- Gluten-Free and Nut-Free Option : Replace nuts with seeds like pumpkin seeds or sunflower seeds for a nut-free alternative.
Serving Suggestions
Protein Bars are versatile enough to serve in a variety of settings:
- For Breakfast : Pair with a piece of fruit or a green smoothie for a quick and satisfying start to your day.
- At Work or School : Pack them in lunchboxes or bags for a convenient midday snack.
- Post-Workout : Enjoy after exercise to replenish energy and repair muscles.
- With Beverages : Serve with coffee, tea, or a glass of almond milk for a refreshing pairing.
Nutritional Information
Understanding the nutritional content of your meals helps you enjoy them mindfully. Here’s an approximate breakdown per bar (assuming 10 servings):
- Calories: 150–180
- Fat: 10g
- Carbohydrates: 8g (net carbs)
- Fiber: 3g
- Protein: 6g
These numbers may vary slightly depending on the brands of ingredients used. Always check nutrition labels for accuracy.
Frequently Asked Questions (FAQs)
Q: Can I use regular protein powder instead of plant-based? A: Yes, but note that whey or casein protein powders are not vegan. Stick to plant-based options like pea, hemp, or brown rice protein for a vegan-friendly bar.
Q: What can I use instead of almond butter? A: Peanut butter, sunflower seed butter, or tahini work well as substitutes for almond butter.
Q: Can I freeze these bars? A: Absolutely! Store them in a freezer-safe container for up to 3 months. Thaw in the refrigerator before serving.
Q: How do I prevent the bars from being too crumbly? A: Ensure the mixture holds together when pressed between your fingers. If it’s too dry, add a bit more nut butter or syrup.
Q: Can I make these bars nut-free? A: Yes! Replace nuts with seeds like pumpkin seeds or sunflower seeds for a nut-free alternative.
Conclusion
Homemade Protein Bars are proof that you don’t have to sacrifice flavor or nutrition to enjoy a convenient, energy-boosting snack while sticking to your dietary goals. With their customizable flavors, nutrient-dense ingredients, and endless possibilities, these bars are sure to become a staple in your kitchen. Whether you’re serving them for breakfast, packing them for work, or simply treating yourself, this recipe guarantees a result that’s as easy to make as it is satisfying.
So gather your ingredients, mix up that dough, and get ready to create a batch of bars that will leave everyone asking for more. Happy cooking—and happy snacking!
Print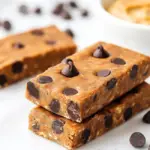
Protein Bars: A Nutritious, Customizable Snack for Every Lifestyle
Ingredients
![]() ¼ cup plant-based vanilla protein powder
¼ cup plant-based vanilla protein powder![]() 1 cup oat flour
1 cup oat flour![]() ¼ teaspoon salt (omit if peanut butter is salted)
¼ teaspoon salt (omit if peanut butter is salted)![]() ½ cup creamy natural peanut butter (or almond butter)
½ cup creamy natural peanut butter (or almond butter)![]() ¼ cup honey (or maple syrup)
¼ cup honey (or maple syrup)![]() 1 Tablespoon melted coconut oil (plus more if needed)
1 Tablespoon melted coconut oil (plus more if needed)![]() 1 teaspoon vanilla extract
1 teaspoon vanilla extract![]() 2-4 Tablespoons chocolate chips (plus more for topping)
2-4 Tablespoons chocolate chips (plus more for topping)
Instructions
1. Line a loaf pan with parchment paper and set aside.
2. In a mixing bowl, combine protein powder, oat flour, and salt.
3. Add peanut butter, honey, vanilla, and coconut oil. Mix until a thick dough forms, using your hands if necessary. If too dry, add more melted coconut oil or water, one teaspoon at a time.
4. Stir in chocolate chips.
5. Press the dough into the lined loaf pan and sprinkle more chocolate chips on top, pressing them in gently.
6. Chill in the fridge for at least one hour before cutting into 6 equal bars.
7. Enjoy! Bars can be stored in the fridge for about a week or frozen for up to 3 months.
PREP TIME & NUTRITION:
Prep Time: 10 minutes, Chill Time: 1 hour, Total Time: 1 hour 10 minutes, Servings: 6, Calories: 294, Net Carbs: 32g, Fats: 16g, Protein: 12g