
Golden, Sticky, and Better Than Takeout
If you’re craving crispy chicken coated in a glossy, sweet-and-savory sauce, this Crispy Chinese Honey Garlic Chicken is exactly what you need. With crunchy fried chicken bites tossed in a rich honey garlic glaze, this dish delivers bold flavor and irresistible texture in every bite.
Perfect for weeknight dinners or special occasions, this homemade version rivals your favorite takeout—only fresher, crispier, and customizable.
What Is Chinese Honey Garlic Chicken?
Honey garlic chicken is a popular Chinese-style dish made with:
- Bite-sized crispy chicken
- A sticky sauce of honey, garlic, and soy sauce
- Optional vegetables or garnishes
It’s known for its perfect balance of sweetness, saltiness, and savory depth.
Why You’ll Love This Recipe
Ultra Crispy Texture
Golden, crunchy chicken pieces.
Sweet & Savory Flavor
Perfectly balanced honey garlic sauce.
Better Than Takeout
Fresh ingredients and less oil.
Easy to Customize
Adjust sweetness, spice, or ingredients.
Restaurant-Quality at Home
Impressive yet simple to make.
Ingredients You’ll Need
For the Chicken:
- 2 boneless, skinless chicken breasts (cut into bite-sized pieces)
- ½ cup cornstarch
- 2 eggs (beaten)
- Salt and pepper
- Oil for frying
For the Honey Garlic Sauce:
- ⅓ cup honey
- 3 tablespoons soy sauce
- 4 cloves garlic (minced)
- 1 tablespoon rice vinegar
- 1 tablespoon cornstarch + 2 tablespoons water (slurry)
Optional Garnishes:
- Green onions
- Sesame seeds
Step-by-Step Instructions
Step 1: Prepare the Chicken
Season chicken with salt and pepper.
Dip pieces in beaten eggs, then coat in cornstarch.
Step 2: Fry the Chicken
Heat oil in a pan over medium-high heat.
Fry chicken in batches for 5–6 minutes until golden and crispy. Remove and drain.
Step 3: Make the Sauce
In a saucepan, combine:
- Honey
- Soy sauce
- Garlic
- Vinegar
Simmer for 2–3 minutes, then add cornstarch slurry and cook until thickened.
Step 4: Toss the Chicken
Add fried chicken to the sauce and toss until fully coated.
Step 5: Serve
Serve hot, garnished with green onions and sesame seeds.
Tips for Perfect Honey Garlic Chicken
Double Fry for Extra Crispiness
Fry once, rest, then fry again briefly.
Use Cornstarch
Gives a lighter, crispier coating than flour.
Don’t Overcrowd the Pan
Ensures even frying.
Add Sauce Last
Prevents sogginess.
Health Considerations
This dish is indulgent but can be adjusted:
- Chicken: High in protein
- Honey: Natural sweetener
To make it healthier:
- Air-fry or bake the chicken
- Reduce sugar
- Add vegetables
Variations to Try
Spicy Honey Garlic Chicken 🌶️
Add chili flakes or sriracha.
Baked Version
Bake at 200°C (400°F) for 20–25 minutes.
Air Fryer Version
Cook at 190°C (375°F) for 12–15 minutes.
Garlic Lover’s Version
Add extra garlic for bold flavor.
Veggie Stir-Fry Version
Add broccoli, peppers, or snap peas.
What to Serve with Honey Garlic Chicken
Pair with:
- Steamed rice
- Fried rice
- Noodles
- Stir-fried vegetables
Storage and Meal Prep Tips
Storage
Store in an airtight container for up to 3 days.
Reheating
Reheat in oven or air fryer to maintain crispiness.
Freezing
Freeze chicken separately from sauce if possible.
Common Mistakes to Avoid
- Using too much sauce
- Skipping cornstarch coating
- Overcrowding the pan
- Adding sauce too early
Frequently Asked Questions
Can I use chicken thighs?
Yes, they’re juicier and more flavorful.
Can I make it ahead?
Yes, but best served fresh for crispiness.
Is it very sweet?
Balanced, but adjustable.
Can I bake instead of fry?
Absolutely.
Pro Tips for Restaurant-Style Results
- Use high heat for frying
- Toss quickly in sauce
- Garnish for presentation
Final Thoughts
Crispy Chinese Honey Garlic Chicken is the perfect combination of crunch and flavor. With its sticky glaze and golden texture, it’s a dish that’s sure to impress and satisfy.
Once you try it at home, you’ll never look at takeout the same way again.
Print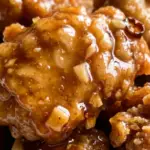
Crispy Chinese Honey Garlic Chicken 🍯🧄🍗
Ingredients
Crispy chicken:
- 1½ lbs boneless chicken thighs or breasts, cut into 1” pieces
- ¼ cup cornstarch (or almond flour for low-carb—you love this!)
- 1 egg white, beaten
- 2 tbsp avocado oil (for stovetop) or cooking spray (for air fryer)
Honey garlic sauce (you control the sugar & sodium!):
- ¼ cup sugar-free honey substitute (e.g., Lakanto Golden—you love blood sugar friendly!)
- 3 tbsp low-sodium soy sauce or coconut aminos (you love low-sodium options!)
- 3 garlic cloves, minced
- 1 tbsp rice vinegar
- 1 tsp sesame oil
- ½ tsp red pepper flakes (optional—you love spicy!)
- 1½ tsp cornstarch + 1 tbsp water (slurry—for glossy finish)
For serving:
- Sesame seeds
- Sliced green onions
- Steamed broccoli or cauliflower rice (low-carb—you love this!)
Instructions
1. Crisp the chicken (choose method):
- Air Fryer (recommended):
→ Toss chicken with egg white and cornstarch until fully coated.
→ Air fry at 400°F (200°C) for 10–12 minutes, shaking halfway, until golden and crisp. - Stovetop:
→ Heat oil in skillet over medium-high. Cook chicken 3–4 min per side until crispy and cooked through.
2. Make honey garlic sauce:
- Whisk sugar-free honey, soy sauce, garlic, rice vinegar, sesame oil, and red pepper flakes in a small saucepan.
- Bring to a gentle simmer over medium heat.
- Stir in cornstarch slurry; cook 1–2 minutes until thick, glossy, and coats the back of a spoon.
3. Finish & serve:
💡 Pro Tips for Perfection:
✅ Use chicken thighs—they stay juicier than breasts during high-heat cooking.
✅ Pat chicken dry before coating—ensures maximum crispiness.
✅ Low-sodium mastery (you love this!):
→ Use coconut aminos + skip added salt
→ Boost umami with extra garlic and sesame oil
✅ Blood sugar friendly (you love this!):
→ Sugar-free honey = zero glycemic impact
→ Net carbs: 6g/serving
✅ Low-carb/keto option (you love this!):
→ Swap cornstarch for almond flour
→ Skip slurry; reduce sauce 3–4 extra minutes for natural thickness
→ Net carbs drop to 4g/serving
✅ Make ahead:
→ Prep sauce 3 days ahead
→ Cook chicken just before serving for best crunch
Prep Time & Nutrition (per serving):
Calories: 380 | Protein: 36g | Net Carbs: 6g | Fats: 20g | Fiber: 1g | Gluten-Free Option • Low-Sodium Adaptable • Blood Sugar Friendly • Low-Carb/Keto Option