If you want a no-fuss dinner with bold tropical flavor, this Sheet Pan Hawaiian Chicken delivers. Juicy chicken roasts alongside caramelized pineapple, bell peppers, and onions in a glossy sweet-savory sauce. Everything cooks on one pan for easy prep and cleanup.
What Is Sheet Pan Hawaiian Chicken?
It’s a one-pan meal where chicken and vegetables roast together with a pineapple-based sauce. The heat concentrates the flavors, lightly chars the veggies, and creates a sticky glaze on the chicken.
Expect:
- Sweet + savory balance (pineapple + soy/garlic)
- Tender, juicy chicken
- Caramelized edges from roasting
- Minimal dishes
Why You’ll Love This Recipe
- Hands-off cooking: oven does the work
- Family-friendly flavor: mild, slightly sweet
- Meal-prep ready: reheats well
- Flexible: swap veggies or protein easily
Ingredients You’ll Need
Protein & Produce
- 1.5–2 lbs chicken (thighs or breasts, bite-size or whole pieces)
- 2 cups pineapple chunks (fresh or canned, drained)
- 1 red bell pepper, sliced
- 1 green bell pepper, sliced
- 1 small red onion, sliced
Sauce
- 1/3 cup soy sauce
- 2–3 tablespoons honey or maple syrup
- 2 tablespoons ketchup
- 1 tablespoon rice vinegar or lime juice
- 3 cloves garlic, minced
- 1 teaspoon grated ginger (optional)
- 1 tablespoon cornstarch + 2 tablespoons water (slurry)
Optional Garnish
- Green onions
- Sesame seeds
How to Make Sheet Pan Hawaiian Chicken
Step 1: Preheat & Prep
- Preheat oven to 400°F (200°C)
- Line a large sheet pan with parchment or foil
Step 2: Arrange Ingredients
- Spread chicken, pineapple, peppers, and onion on the pan
- Keep pieces in a single layer for even roasting
Step 3: Make the Sauce
Whisk together:
- Soy sauce, honey, ketchup, vinegar, garlic, ginger
Pour evenly over everything and toss lightly to coat.
Step 4: Roast
- Bake for 20–25 minutes (longer if using larger chicken pieces)
- Flip halfway for even browning
Step 5: Thicken the Sauce
- Remove pan briefly
- Stir in cornstarch slurry across the pan juices
- Return to oven for 5–7 minutes until glossy and slightly thickened
Step 6: Finish & Serve
- Garnish with green onions and sesame seeds
- Serve hot
Pro Tips for Best Results
- Use chicken thighs for juicier results
- Don’t overcrowd the pan (use two pans if needed)
- Broil for 2–3 minutes at the end for extra caramelization
- Pat pineapple dry to prevent excess moisture
Easy Variations
Spicy Hawaiian Chicken
Add chili flakes or sriracha to the sauce.
Teriyaki-Style
Swap ketchup for extra soy + a bit of brown sugar.
Low-Carb Version
Serve over cauliflower rice.
BBQ Hawaiian Chicken
Mix a little BBQ sauce into the glaze.
Veggie-Loaded
Add zucchini, snap peas, or carrots.
What to Serve With It
- Steamed white or jasmine rice
- Coconut rice
- Quinoa
- Noodles
- Simple cucumber salad
Storage & Reheating
- Fridge: up to 4 days (airtight container)
- Freezer: up to 2 months
- Reheat: stovetop or oven for best texture
Nutrition Highlights
- High protein from chicken
- Vitamin-rich veggies
- Balanced sweet-savory profile
- Easily adjustable for lower sugar
Common Mistakes to Avoid
- Overcrowding the pan (leads to steaming)
- Skipping the thickening step
- Using too much liquid (dilutes flavor)
- Overcooking chicken breasts
FAQs
Can I use canned pineapple?
Yes—drain well for best results.
Can I prep ahead?
Yes—assemble everything and refrigerate up to 24 hours before baking.
Is it very sweet?
Balanced, but you can reduce honey if preferred.
Can I use frozen chicken?
Thaw first for even cooking.
Final Thoughts
This Sheet Pan Hawaiian Chicken is a reliable, flavor-forward dinner that keeps things simple without sacrificing taste. Sweet pineapple, savory glaze, and tender chicken come together in one pan—exactly what weeknights need.
Print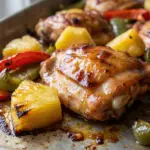
Sheet Pan Hawaiian Chicken (Sweet, Savory & Weeknight-Easy)
Ingredients
Chicken & marinade:
- 1½ lbs bone-in, skin-on chicken thighs (or boneless for quicker cook)
- 2 tbsp olive oil
- Salt & black pepper
Hawaiian glaze:
- ⅓ cup low-sodium soy sauce (you love low-sodium options!)
- ¼ cup pineapple juice (from canned pineapple—no added sugar)
- 2 tbsp rice vinegar
- 2 tbsp honey (or sugar-free maple syrup for blood sugar friendly)
- 1 tbsp fresh ginger, grated
- 2 garlic cloves, minced
- 1 tsp sesame oil
Vegetables:
- 1 (20 oz) can pineapple chunks, drained (reserve juice for glaze)
- 1 bell pepper (any color), sliced
- 1 red onion, sliced
- Optional: 1 zucchini, sliced (for extra veg)
Garnish:
- Sliced green onions
- Toasted coconut flakes (you love coconut!)
- Sesame seeds
- Lime wedges
Instructions
1. Prep & marinate:
- Preheat oven to 425°F (220°C). Line a rimmed baking sheet with parchment.
- Pat chicken dry; season with salt, pepper, and olive oil. Let sit 10 min.
2. Make glaze:
3. Assemble sheet pan:
- Arrange chicken skin-side up on one side of the pan.
- On the other side, toss pineapple, bell pepper, and onion with 2 tbsp glaze.
4. Roast:
- Bake 20 minutes.
- Remove from oven; brush chicken and veggies with remaining glaze.
- Return to oven; bake 10–15 minutes more until chicken reaches 175°F and skin is crispy.
5. Serve:
→ Steamed rice (classic)
→ Cauliflower rice (low-carb—you love this!)
→ Zucchini noodles
💡 Pro Tips for Perfection:
✅ Use bone-in thighs—they stay juicier during roasting than breasts.
✅ Don’t overcrowd the pan—space ensures caramelization, not steaming.
✅ Low-sodium mastery (you love this!):
→ Use coconut aminos instead of soy sauce
→ Boost flavor with extra ginger, garlic, and 1 tbsp lime juice at the end
✅ Blood sugar friendly (you love this!):
→ Replace honey with sugar-free maple syrup
→ Add 1 tbsp chia seeds to glaze for fiber + glycemic control
→ Net carbs: ~16g/serving
✅ Low-carb/keto option (you love this!):
→ Skip rice entirely
→ Increase non-starchy veggies (zucchini, bell pepper)
→ Use keto-friendly sweetener (monk fruit blend)
→ Net carbs drop to ~9g/serving
✅ Extra richness: Drizzle with 1 tbsp melted butter before serving (you love buttery richness!).
✅ Make ahead: Glaze and chop veggies 1 day ahead. Assemble and roast just before serving.
Prep Time & Nutrition (per serving):
Calories: 420 | Protein: 32g | Net Carbs: 28g | Fats: 22g | Fiber: 4g | Gluten-Free Option • Low-Sodium Adaptable • Blood Sugar Friendly • Low-Carb/Keto Option