What happens when you take the creamy, coffee-kissed magic of tiramisu and combine it with the soft, pillowy goodness of whoopie pies? You get these heavenly Tiramisu Whoopie Pies—the perfect fusion of two beloved desserts!

These delightful little cakes are rich, chocolatey, and infused with coffee, while the mascarpone filling brings that signature tiramisu creaminess. Whether you’re looking for a romantic treat, a holiday indulgence, or a fun baking project, this recipe is guaranteed to impress.
But wait—there’s more! These whoopie pies are surprisingly easy to make at home, even if you’re not a professional baker. Plus, they taste like something straight out of a fancy Italian café.
So, are you ready to elevate your baking game? Let’s dive into the magic of Tiramisu Whoopie Pies!
Why You’ll Love This Recipe
There are countless reasons to love these Tiramisu Whoopie Pies, but here are the top four:
1. The Ultimate Dessert Mashup 🍪+☕
These whoopie pies are a perfect cross between a soft cookie, a fluffy cake, and a classic tiramisu dessert. You get the best of all three in every bite!
2. A Coffee Lover’s Dream ☕
If you can’t start your day without coffee, this dessert is for you! The combination of cocoa, warm coffee, and instant coffee in the filling creates a bold, aromatic flavor that coffee enthusiasts will adore.
3. The Creamy Mascarpone Filling is to Die For 😍
Tiramisu wouldn’t be tiramisu without its signature mascarpone cream. This recipe delivers a smooth, lightly sweet, and rich filling that balances perfectly with the chocolate cakes.
4. Easy, Yet Impressive! 👩🍳
Whoopie pies might look fancy, but they’re actually super simple to make. Plus, they’re great for parties, gifting, or enjoying as an indulgent treat with a cup of coffee or tea.
Ingredients You’ll Need
To make these luxurious tiramisu whoopie pies, you’ll need just a few pantry staples along with some Italian-inspired ingredients:
For the Cakes:
- 🍫 2 ¼ cups (270 g) all-purpose flour – The base for your fluffy chocolate cakes.
- 🍫 ½ cup (40 g) unsweetened cocoa powder (preferably Dutch-processed) – Provides that deep, rich chocolate flavor.
- 1 tsp baking powder – Helps the cakes rise and stay soft.
- 1 tsp kosher salt – Balances the sweetness and enhances the cocoa.
- ½ tsp baking soda – Ensures a light and airy texture.
- 1 cup (215 g) light brown sugar – For a soft, moist cake with a slight caramel undertone.
- ¼ cup vegetable oil – Keeps the cakes tender and moist.
- ½ cup (115 g) unsalted butter, softened – Adds richness and flavor.
- 1 large egg – Binds the ingredients together.
- 1 tsp pure vanilla extract – Adds warmth and depth of flavor.
- ¾ cup milk – Helps create a smooth batter.
- ¼ cup freshly brewed warm coffee – Enhances the chocolate flavor and adds a delicious coffee note.
For the Mascarpone Coffee Filling:
- ¾ cup heavy cream – Whipped to create a light, airy texture.
- ½ cup (55 g) confectioners’ sugar – Sweetens the filling while keeping it smooth.
- ½ Tbsp instant coffee – Infuses the filling with a bold espresso kick.
- 6 oz mascarpone cheese, cold – Adds creaminess and that signature tiramisu taste.
Step-by-Step Directions
Now that we’ve covered the ingredients, it’s time to bring these Tiramisu Whoopie Pies to life! Follow these easy steps to create the perfect batch.
Making the Cakes
Step 1: Preheat the Oven & Prepare Baking Sheets
Preheat your oven to 350°F (175°C) and line two baking sheets with parchment paper.
Step 2: Mix the Dry Ingredients
In a medium-sized bowl, whisk together:
✅ 2 ¼ cups all-purpose flour
✅ ½ cup Dutch-processed cocoa powder
✅ 1 tsp baking powder
✅ 1 tsp kosher salt
✅ ½ tsp baking soda
Set this mixture aside.
Step 3: Cream the Butter, Sugar & Oil
In a large bowl, beat together:
✅ ½ cup unsalted butter, softened
✅ ½ cup vegetable oil
✅ 1 cup brown sugar
Use a hand mixer (or a stand mixer) on medium-high speed for 2-3 minutes, until the mixture becomes light and fluffy.
Step 4: Add Wet Ingredients
- Add 1 egg and 1 tsp vanilla extract, mixing until well combined.
- Pour in ¾ cup milk and ¼ cup warm coffee, mixing until smooth.
Step 5: Combine and Bake
Gradually add the dry ingredients to the wet ingredients, mixing on low speed until just combined. Scoop about 2-3 tablespoons of batter per cookie onto the baking sheet, leaving 3 inches of space between them.
Bake for 12-14 minutes or until the edges are set but the centers are still soft. Let the cakes cool completely before adding the filling.
How to Make the Mascarpone Coffee Filling
This filling is what makes these whoopie pies truly special. The combination of whipped cream, mascarpone, and coffee creates a light, airy, yet rich texture.
Step 1: Whip the Cream
In a large bowl, use a hand mixer to beat together:
✔ ¾ cup heavy cream
✔ ½ cup confectioners’ sugar
✔ 1/2 Tbsp instant coffee
Mix on medium-high speed until you see soft peaks form.
Step 2: Add the Mascarpone
Gently fold in 6 oz cold mascarpone cheese, adding half first and mixing lightly. Then, add the rest and beat until you reach stiff peaks.
Step 3: Assemble the Whoopie Pies
- Flip over half of the cooled cakes.
- Scoop a generous amount of filling onto each flipped cake.
- Place another cake on top and gently press until the filling spreads slightly.
- Dust with cocoa powder for the finishing touch.
How to Serve & Present Your Tiramisu Whoopie Pies
There are so many ways to enjoy these heavenly treats!
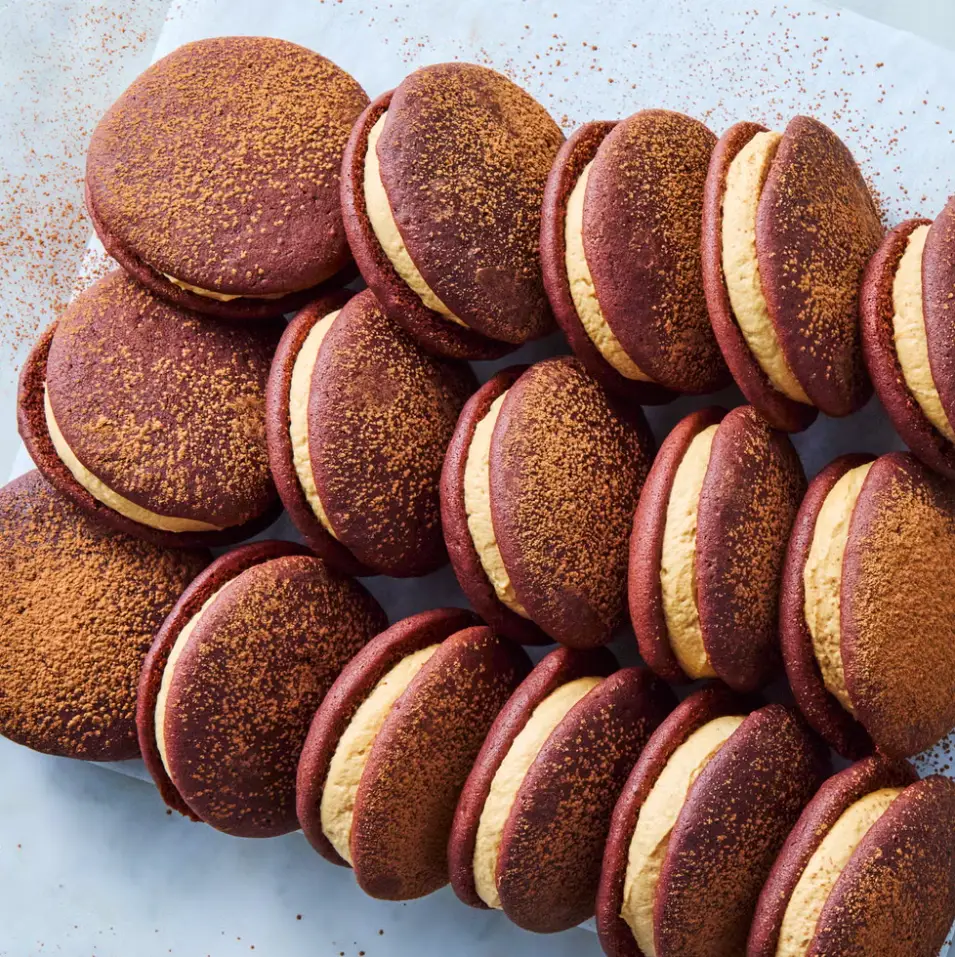
1. Classic Whoopie Pies
Simply dust with cocoa powder, serve on a platter, and watch them disappear.
2. Fancy Tiramisu Style
For an elevated dessert, serve your whoopie pies with a dusting of cocoa powder and a drizzle of chocolate sauce. Pair with a shot of espresso for the full tiramisu experience.
3. Ice Cream Sandwiches
Freeze the whoopie pies for 30 minutes, then serve them as an ice cream sandwich by adding a scoop of gelato in the center.
4. Mini Version for Parties
Use a smaller cookie scoop to make bite-sized whoopie pies—great for serving at parties or afternoon tea!
How to Store Tiramisu Whoopie Pies
Since these whoopie pies are filled with a creamy mascarpone-based filling, proper storage is essential to maintain their freshness and texture. Here’s how you can store them:
1. Storing in the Refrigerator (Recommended)
- Place the whoopie pies in an airtight container in a single layer.
- If stacking them, separate layers with parchment paper to prevent sticking.
- Store in the refrigerator for up to 3 days.
2. Freezing for Longer Storage
- Wrap each whoopie pie individually in plastic wrap and place them in an airtight freezer-safe container.
- Freeze for up to 2 months.
- When ready to eat, let them thaw at room temperature for 15-20 minutes before serving.
3. Can You Store the Filling Separately?
Yes! If you want to make the cakes ahead of time but fill them later:
- Store the mascarpone filling in an airtight container in the fridge for up to 2 days.
- Before using, whisk briefly to restore its fluffy texture.
FAQs – Everything You Need to Know About Tiramisu Whoopie Pies
1. Can I use a different type of cheese instead of mascarpone?
Mascarpone is the best option for an authentic tiramisu flavor, but if you don’t have it, you can substitute cream cheese mixed with 2 tablespoons of heavy cream to mimic its richness.
2. Can I make these whoopie pies without coffee?
Yes! If you prefer a caffeine-free version, replace the coffee with warm milk or a splash of vanilla extract.
3. Can I make them gluten-free?
Absolutely! Use a gluten-free all-purpose flour blend and make sure your baking powder and cocoa powder are gluten-free.
4. Can I make these whoopie pies ahead of time?
Yes! You can bake the cakes up to 2 days in advance and store them in an airtight container at room temperature. The filling should be made fresh or stored in the fridge for up to 2 days. Assemble just before serving for the best texture.
5. My whoopie pies turned out too dry. What went wrong?
If your whoopie pies are dry, it could be because:
- You overmixed the batter, making the cakes dense.
- You baked them too long. Try checking them a minute earlier next time.
- You measured the flour incorrectly. Always use the spoon and level method instead of scooping with the measuring cup.
6. Can I use espresso powder instead of instant coffee?
Yes! Espresso powder has a stronger flavor, so use a little less (about ½ tablespoon instead of 1 tablespoon).
7. Can I make these in different flavors?
Of course! Here are some delicious variations:
- Chocolate-Hazelnut: Add 1 tablespoon of Nutella to the filling.
- Vanilla Latte: Replace the cocoa in the cakes with ¼ cup extra flour and add 1 teaspoon cinnamon to the filling.
- Caramel Macchiato: Swirl in caramel sauce into the filling for a rich, sweet touch.
8. How do I get perfectly round whoopie pies?
For evenly shaped cakes, use a cookie scoop or piping bag to portion the batter. This ensures all cakes are the same size and shape.
9. Can I use a store-bought filling?
You can, but homemade mascarpone filling is what makes these special! If you’re in a rush, use sweetened whipped cream or a tub of cream cheese frosting mixed with coffee extract.
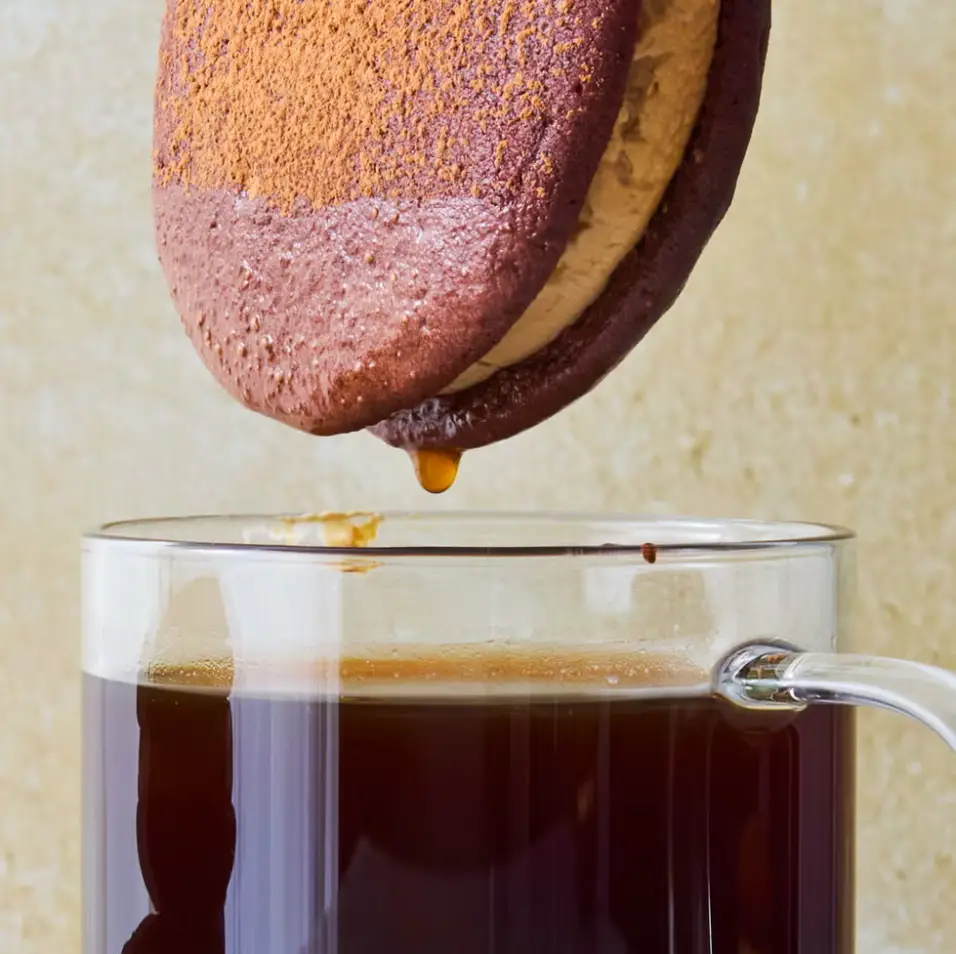
10. What’s the best drink to pair with these whoopie pies?
These pair beautifully with:
- A classic espresso or cappuccino ☕
- A glass of cold milk 🥛
- A dessert wine like Marsala or Baileys Irish Cream 🍷
Final Thoughts – A Treat Worth Making Again & Again!
There’s something irresistible about these Tiramisu Whoopie Pies—from the soft, chocolatey cakes to the rich, coffee-infused mascarpone filling. They’re a fun twist on the classic tiramisu, easy to make, and perfect for any occasion!
Whether you’re baking for a romantic date night, a family gathering, or just to treat yourself, these heavenly bites are sure to impress.
So why wait? Grab your ingredients, preheat the oven, and get ready to enjoy the best whoopie pies you’ve ever had! ❤️🍰☕
Have you tried this recipe? Let us know how it turned out in the comments!

Tiramisu Whoopie Pies ❤️
Ingredients
- Cakes
- Cooking spray
- 2 1/4 cups 270 g. all-purpose flour
- 1/2 cup 40 g. unsweetened cocoa powder (preferably Dutch-processed), plus more for dusting
- 1 tsp. baking powder
- 1 tsp. kosher salt
- 1/2 tsp. baking soda
- 1 cup 215 g. packed light brown sugar
- 1/4 cup vegetable oil
- 4 Tbsp. unsalted butter softened
- 1 large egg
- 1 tsp. pure vanilla extract
- 3/4 cup milk
- 1/4 cup freshly brewed coffee warm
- Mascarpone Coffee Filling
- 3/4 cup heavy cream
- 1/2 cup 55 g. confectioners’ sugar
- 1 Tbsp. instant coffee
- 6 oz. mascarpone cold
Instructions
- Cakes
- Step 1
- Preheat oven to 350°. Line 2 baking sheets with parchment and grease with cooking spray.
- Step 2
- In a medium bowl, whisk flour, cocoa powder, baking powder, salt, and baking soda. In a large bowl, using a handheld mixer on medium-high speed, beat brown sugar, oil, and butter until light and fluffy, 2 to 3 minutes. Add egg and vanilla and beat until combined. Add dry ingredients and beat on medium-low speed until only a few dry streaks remain. Add milk and coffee and beat until just combined.
- Step 3
- Using a medium scoop (about 3 Tbsp.), scoop batter onto prepared sheets, spacing 3″ apart.
- Step 4
- Bake pies until edges are firm and centers are just slightly soft, 12 to 14 minutes. Let cool.
- Mascarpone Coffee Filling
- Step 1
- In a large bowl, using handheld mixer on medium-high speed, beat heavy cream, confectioners’ sugar, and coffee until soft peaks form. Add about half of the mascarpone and beat until just combined. Add remaining mascarpone and beat until stiff peaks form.
- Step 2
- Flip half of discs over. Using medium scoop, scoop frosting onto center of flipped discs. Top with a second disc flat side down and gently press until frosting is almost to the edges. Sprinkle with tips with cocoa powder.